
Happy Thursday friends. Day three of rainbows is here and I’m already so sad we’re over the half way point and it’ll be over tomorrow. Today’s typos will be brought to you from buttery fingers. I’m typing this from the sofa, where the dog is licking toast crumbs off my legs. I should have sorted myself out before I started this post. But I didn’t, and now I can’t get off the sofa. So here we go!
For the craft you will need
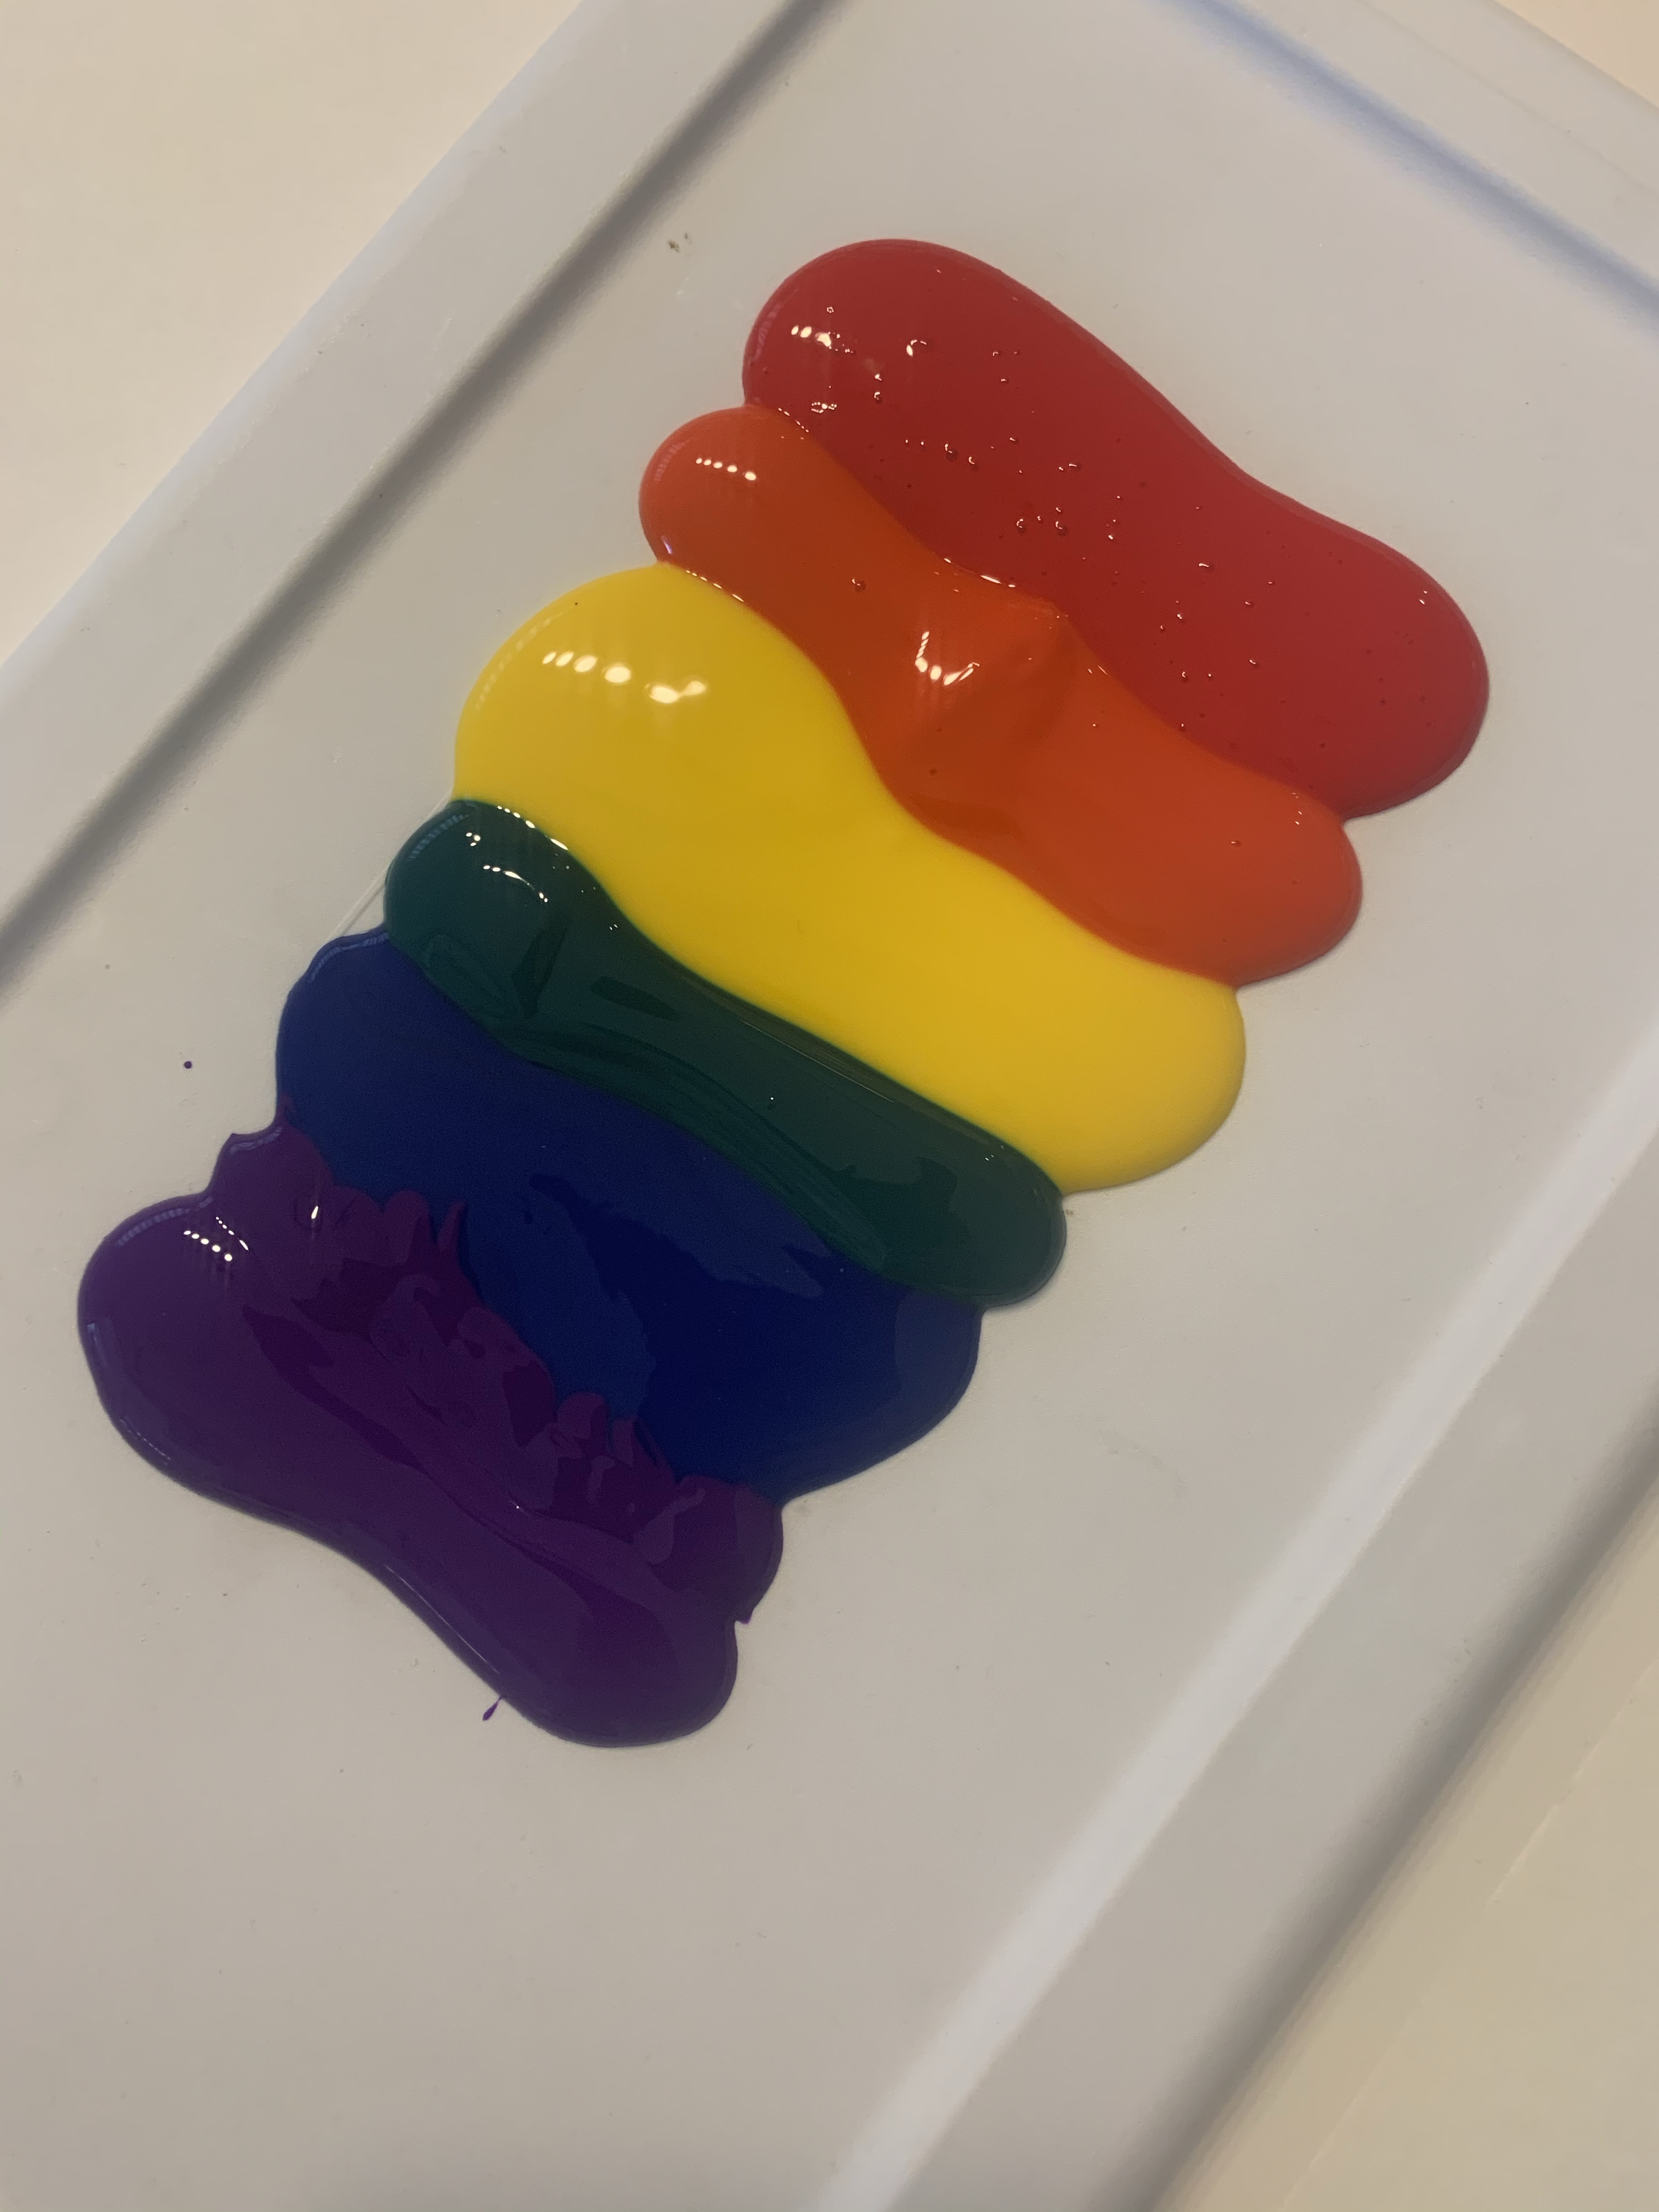
- Paper
- kid safe paint
- Something to put the paint on (I use storage box lids. They’re easy to wipe down, are not disposable which is better for the planet, plus they’re all over my house)
- A hand
- The knowledge that the toddler will put his painted hand on every surface.
Today’s craft was a fab one, because it’s so very easy. Fair warning: the more kids you have the more chance you have one one of them wandering off without washing the paint off their hand. I highly suggest setting them up with toys and then bringing them one by one to take part. You will probably also want to have a bowl of warm water on hand so that you can dunk their hands in it as soon as they’re done. Wipes are useful too. Depending on your house set up, the walk from the craft to the nearest sink can be the most perilous time 😂
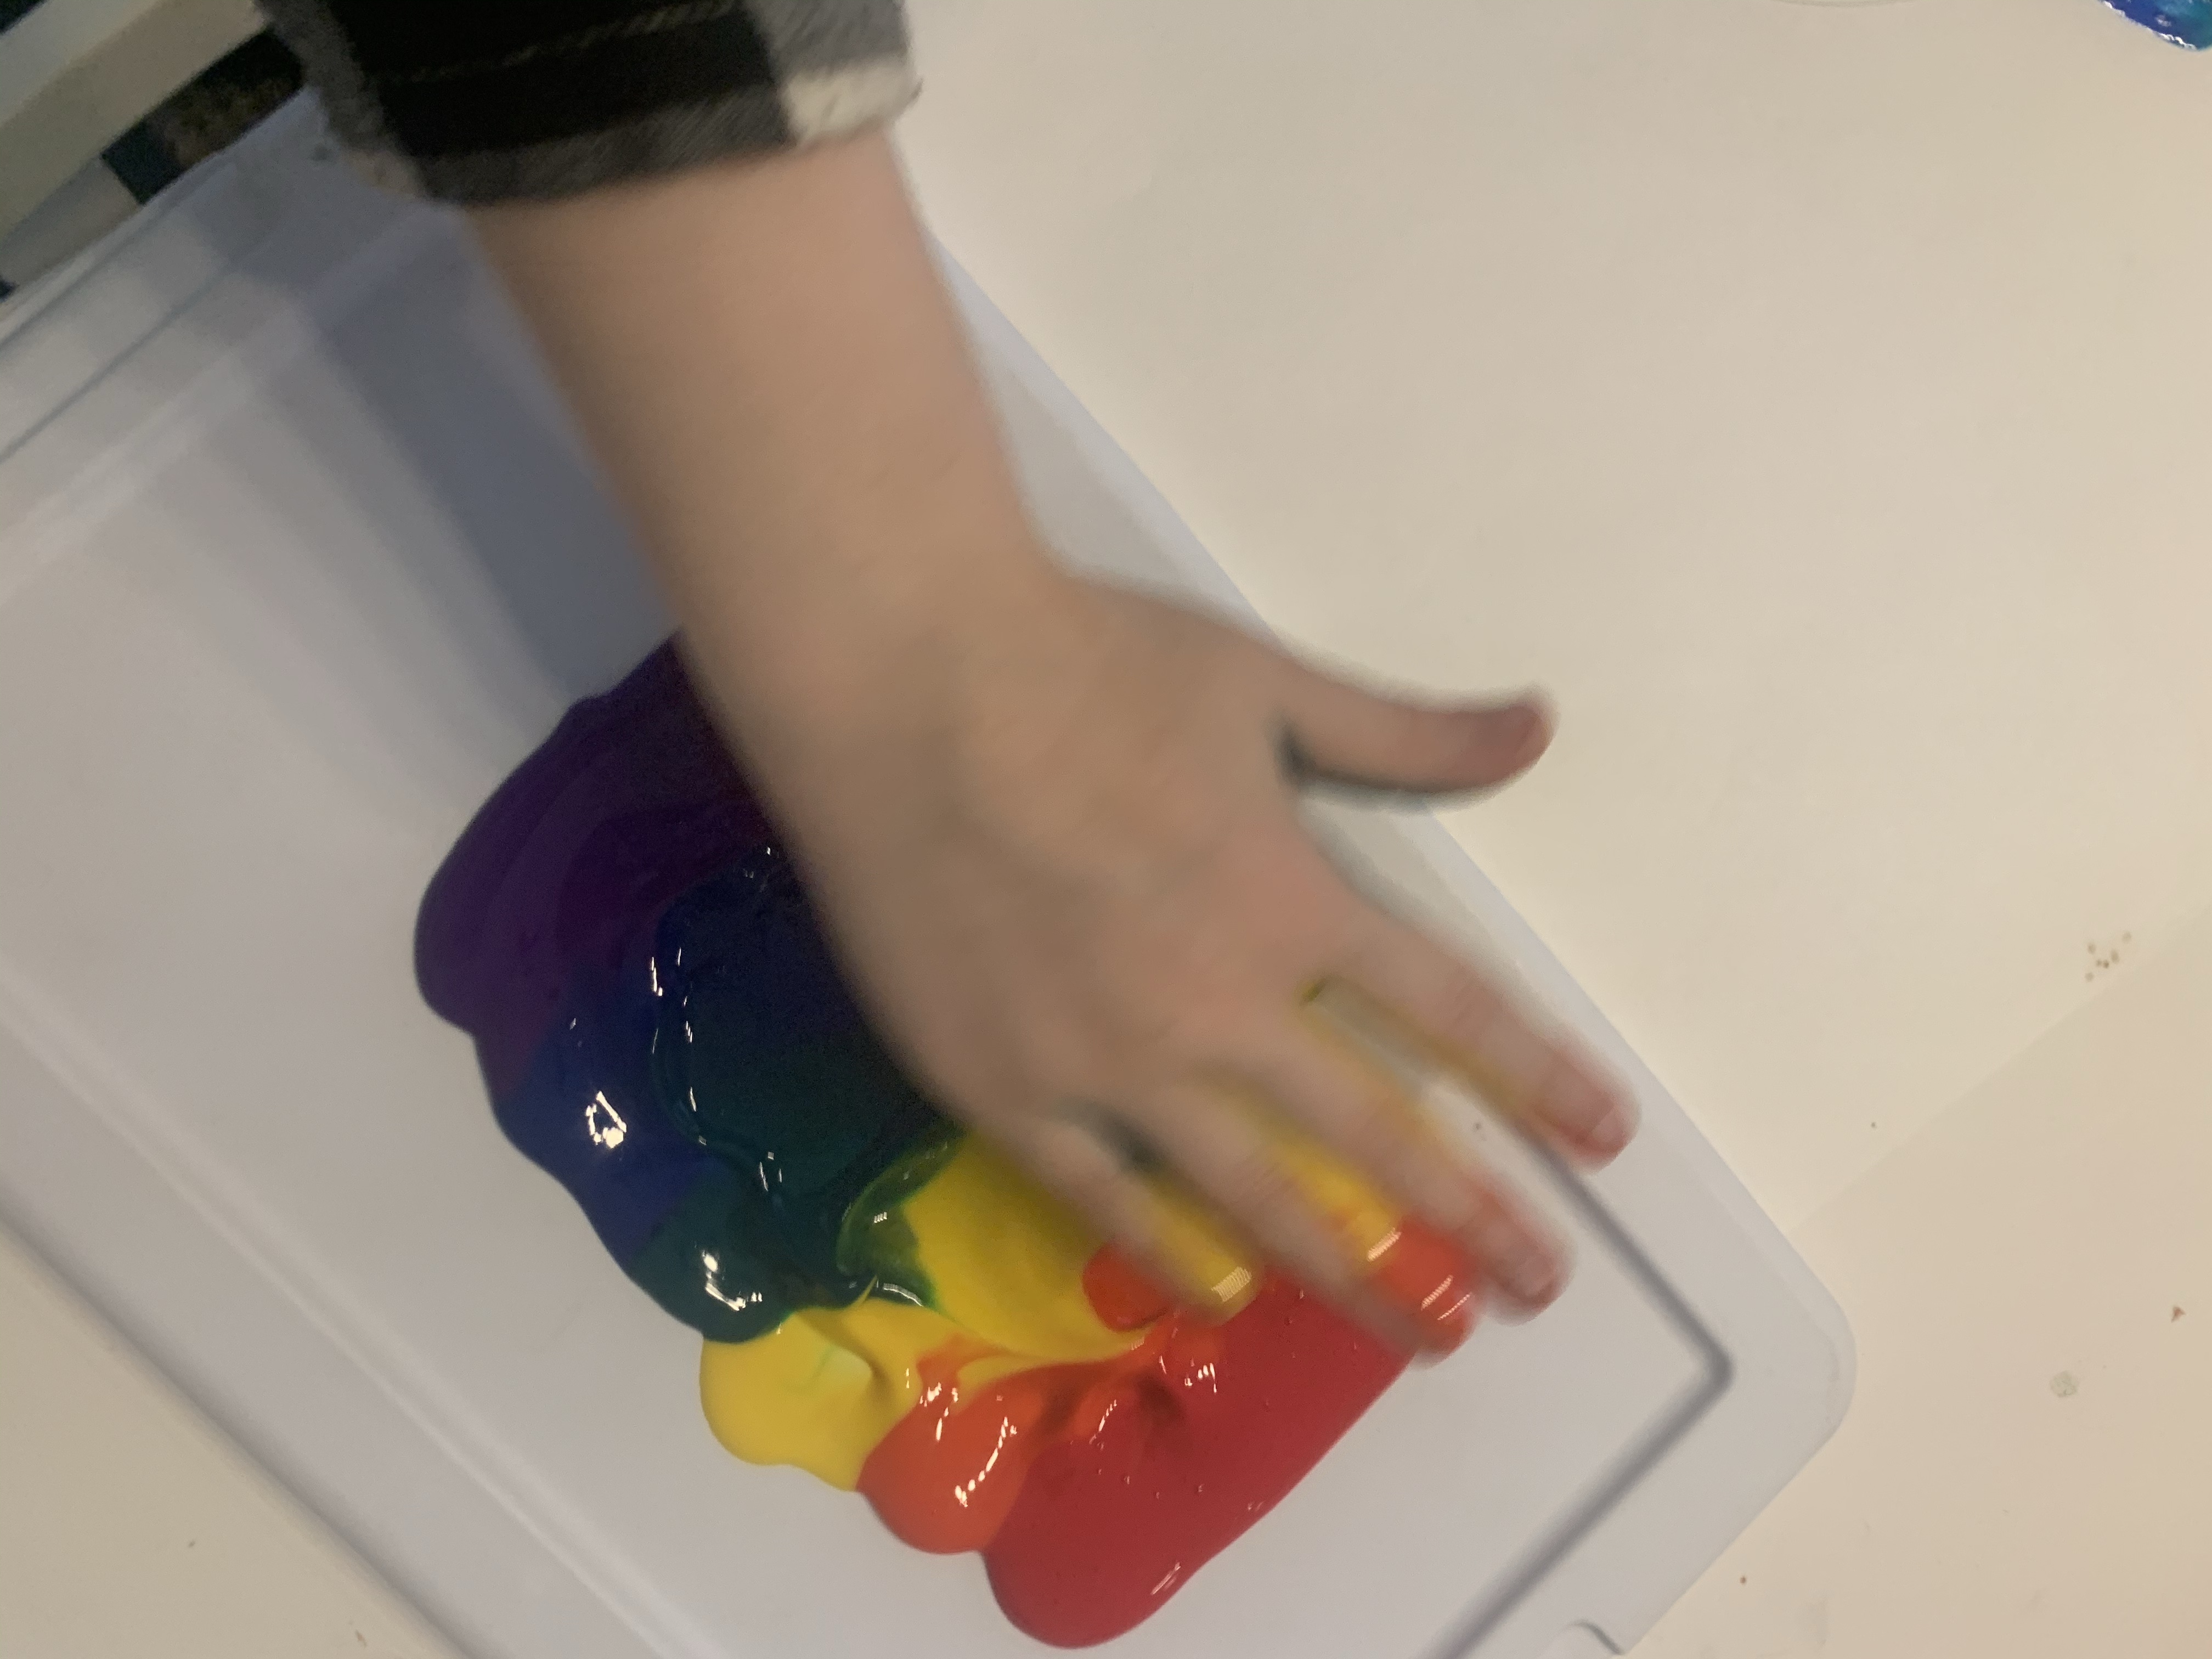
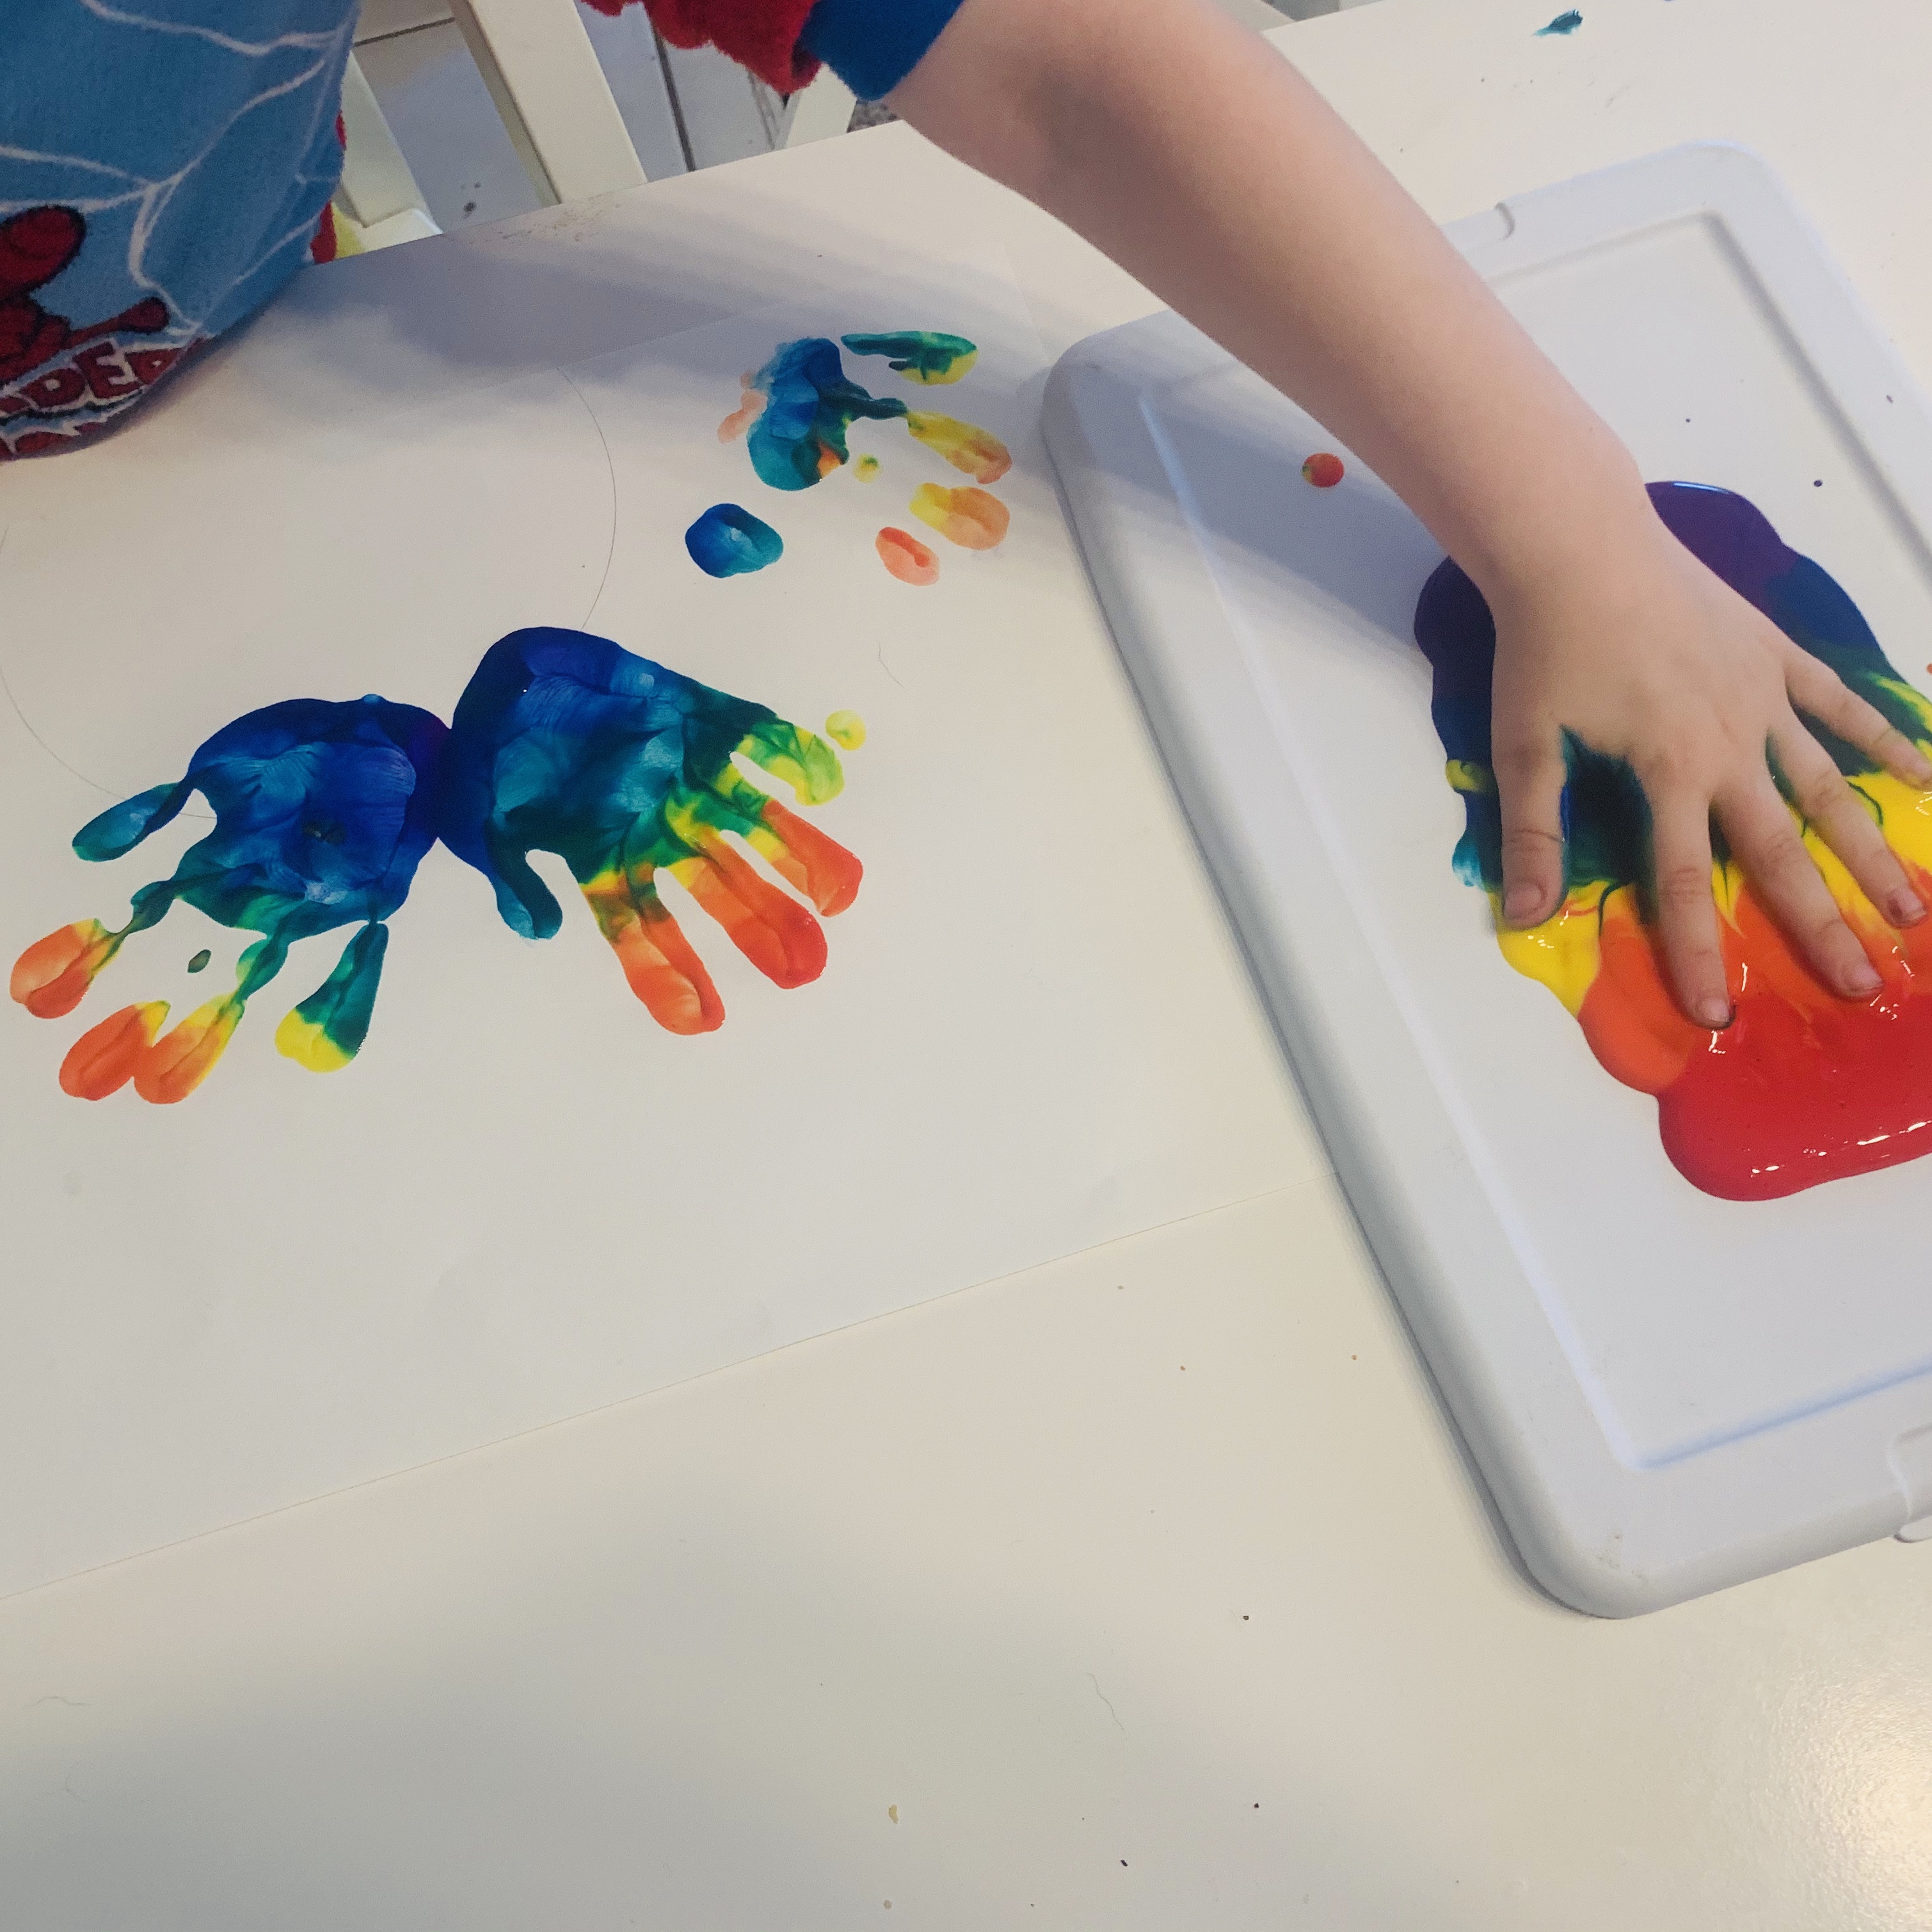
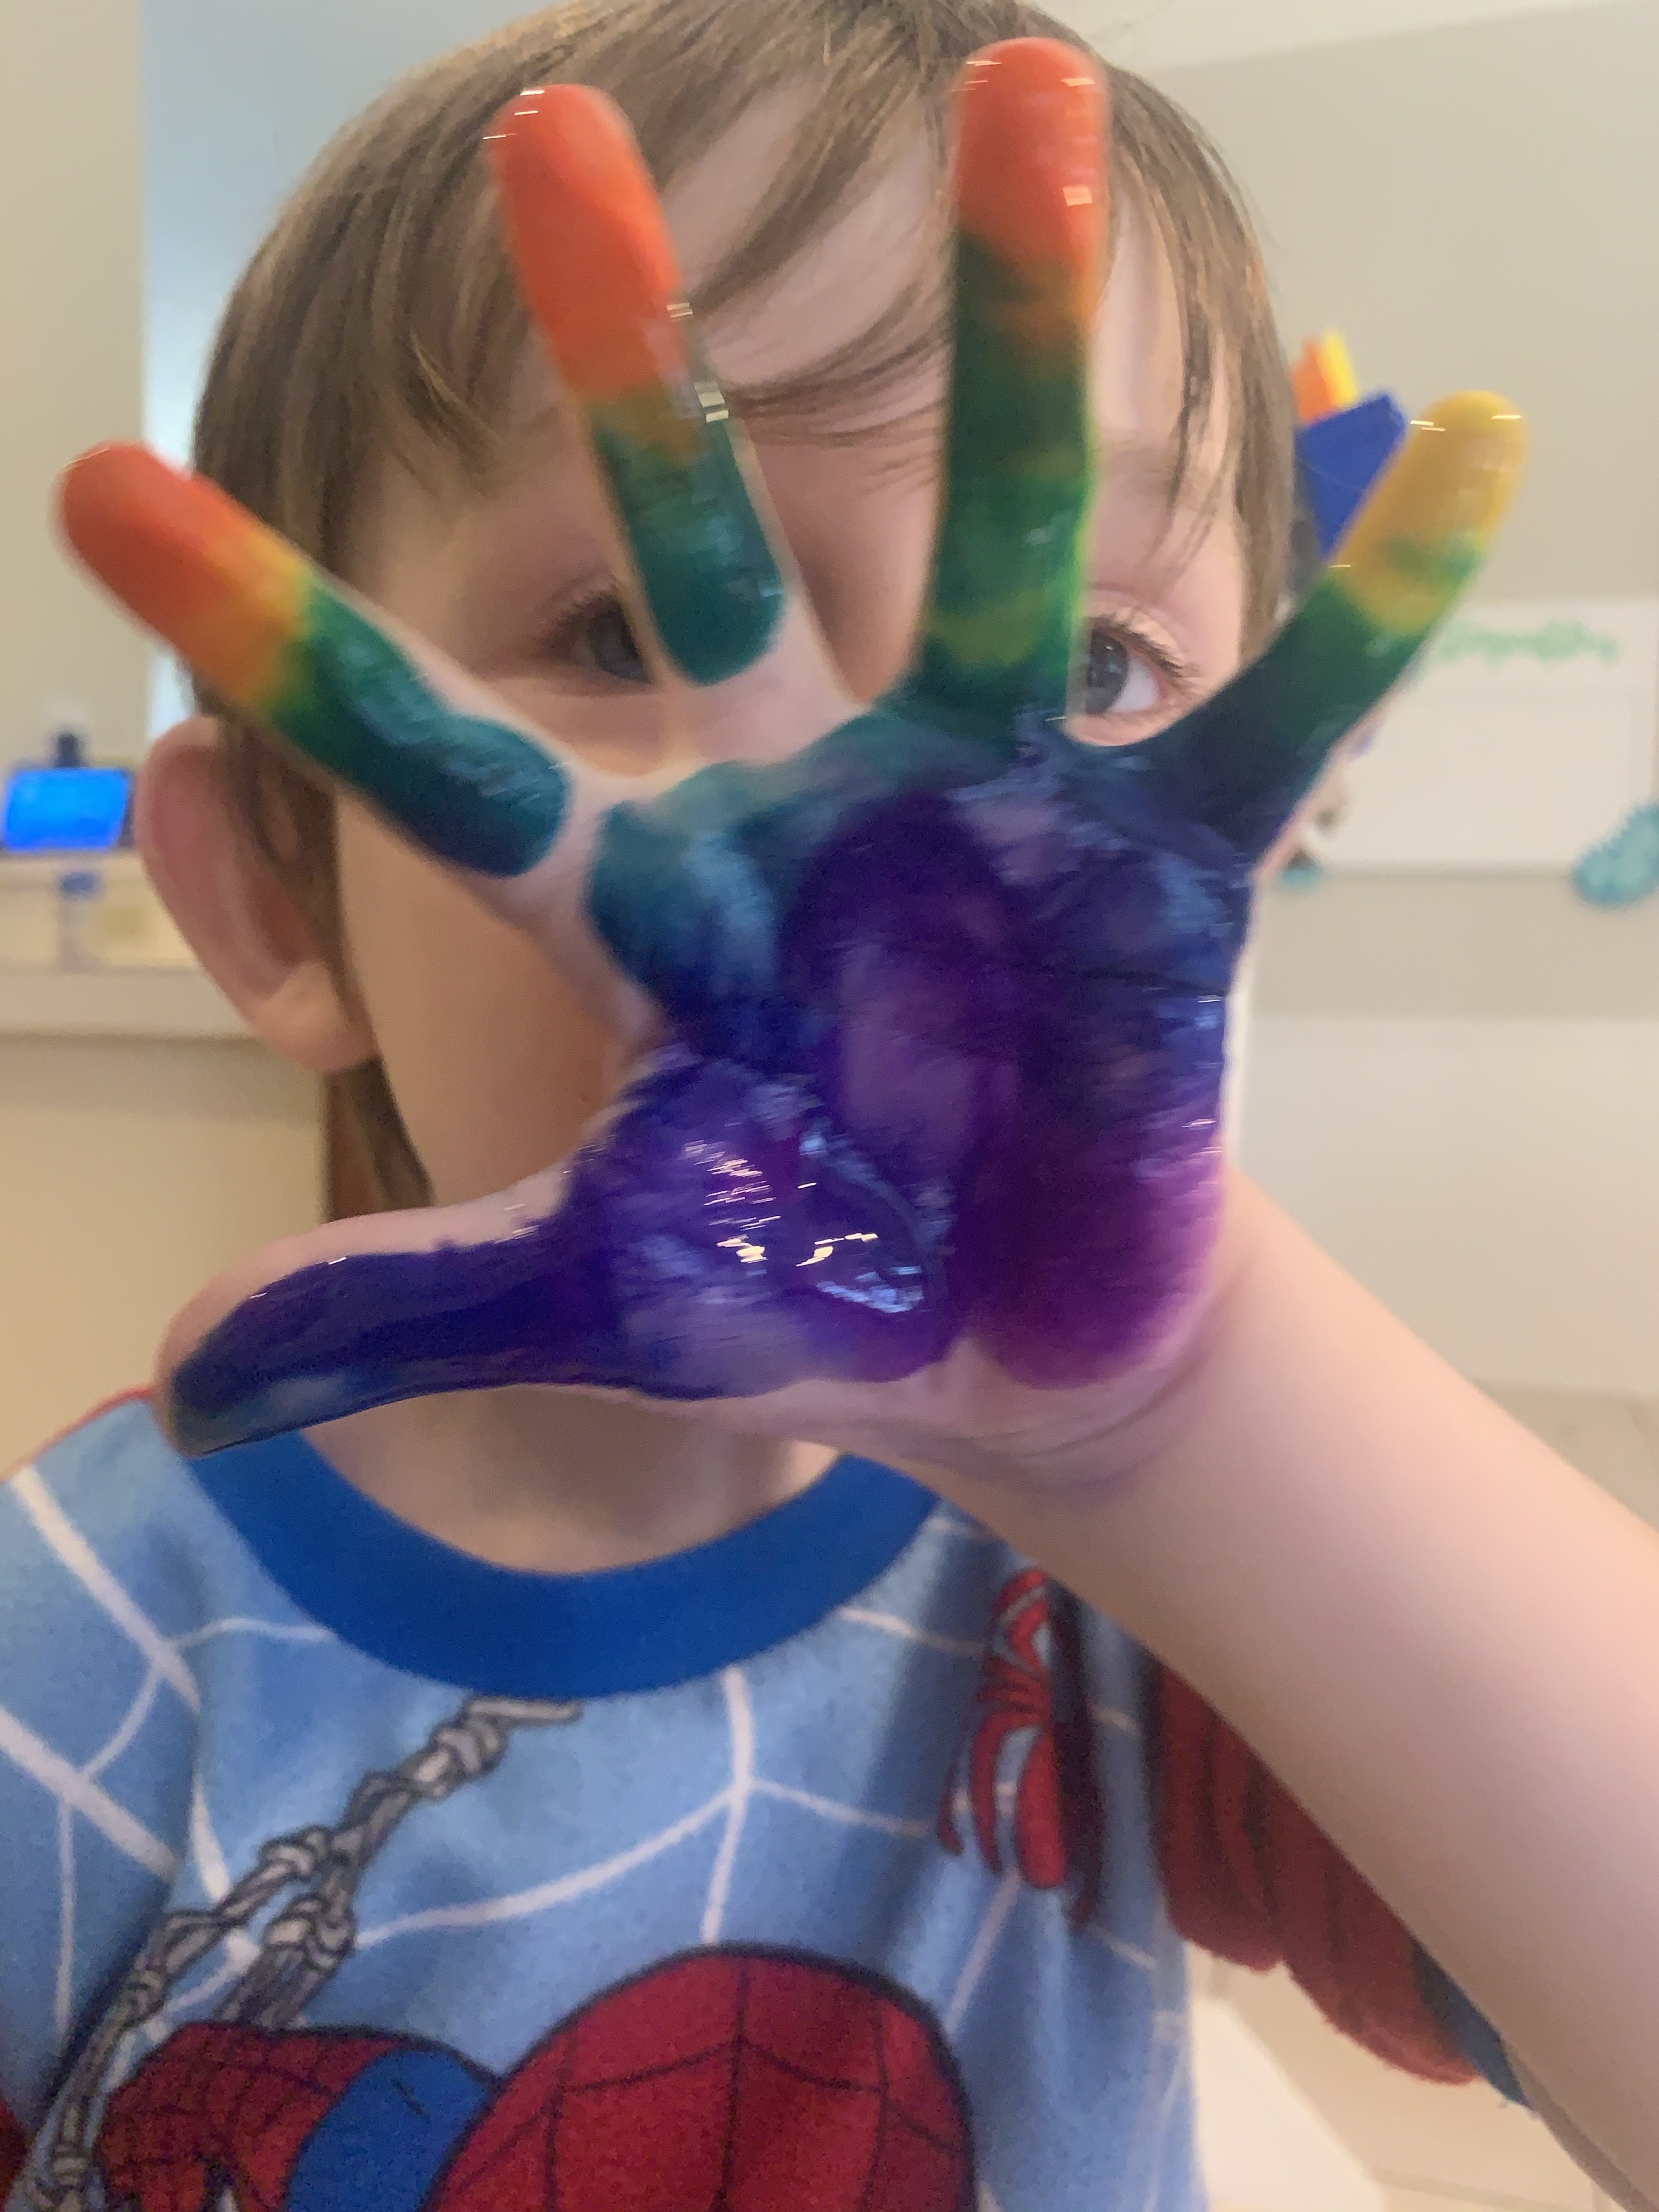
As the weeks go on the difference in the boys for craft interest and ability becomes ever more obvious. William shoved his hand right into the paint and started wiggling it round. I explained to him that he was mixing the colors on the tray and that it would have his handprint less definitively “rainbow”. He couldn’t have cared less. I had to stop him putting his other hand in too. He banged then down on the paper. Splatted them around a bit. Then announced he was over it.
Next up was Teddy. If you’ve been here for longer than a tiny bit you’ll know he is the absolute opposite of his older brother. He gingerly dipped his hand into the paint, to make sure he spread it all over his hand. For his first attempt he was a little too cautious and didn’t cover his whole palm. Because of who he is he didn’t want to re-dip in the paint, because he did not think he could line up the colors the same a second time. So we washed off his hand and started again
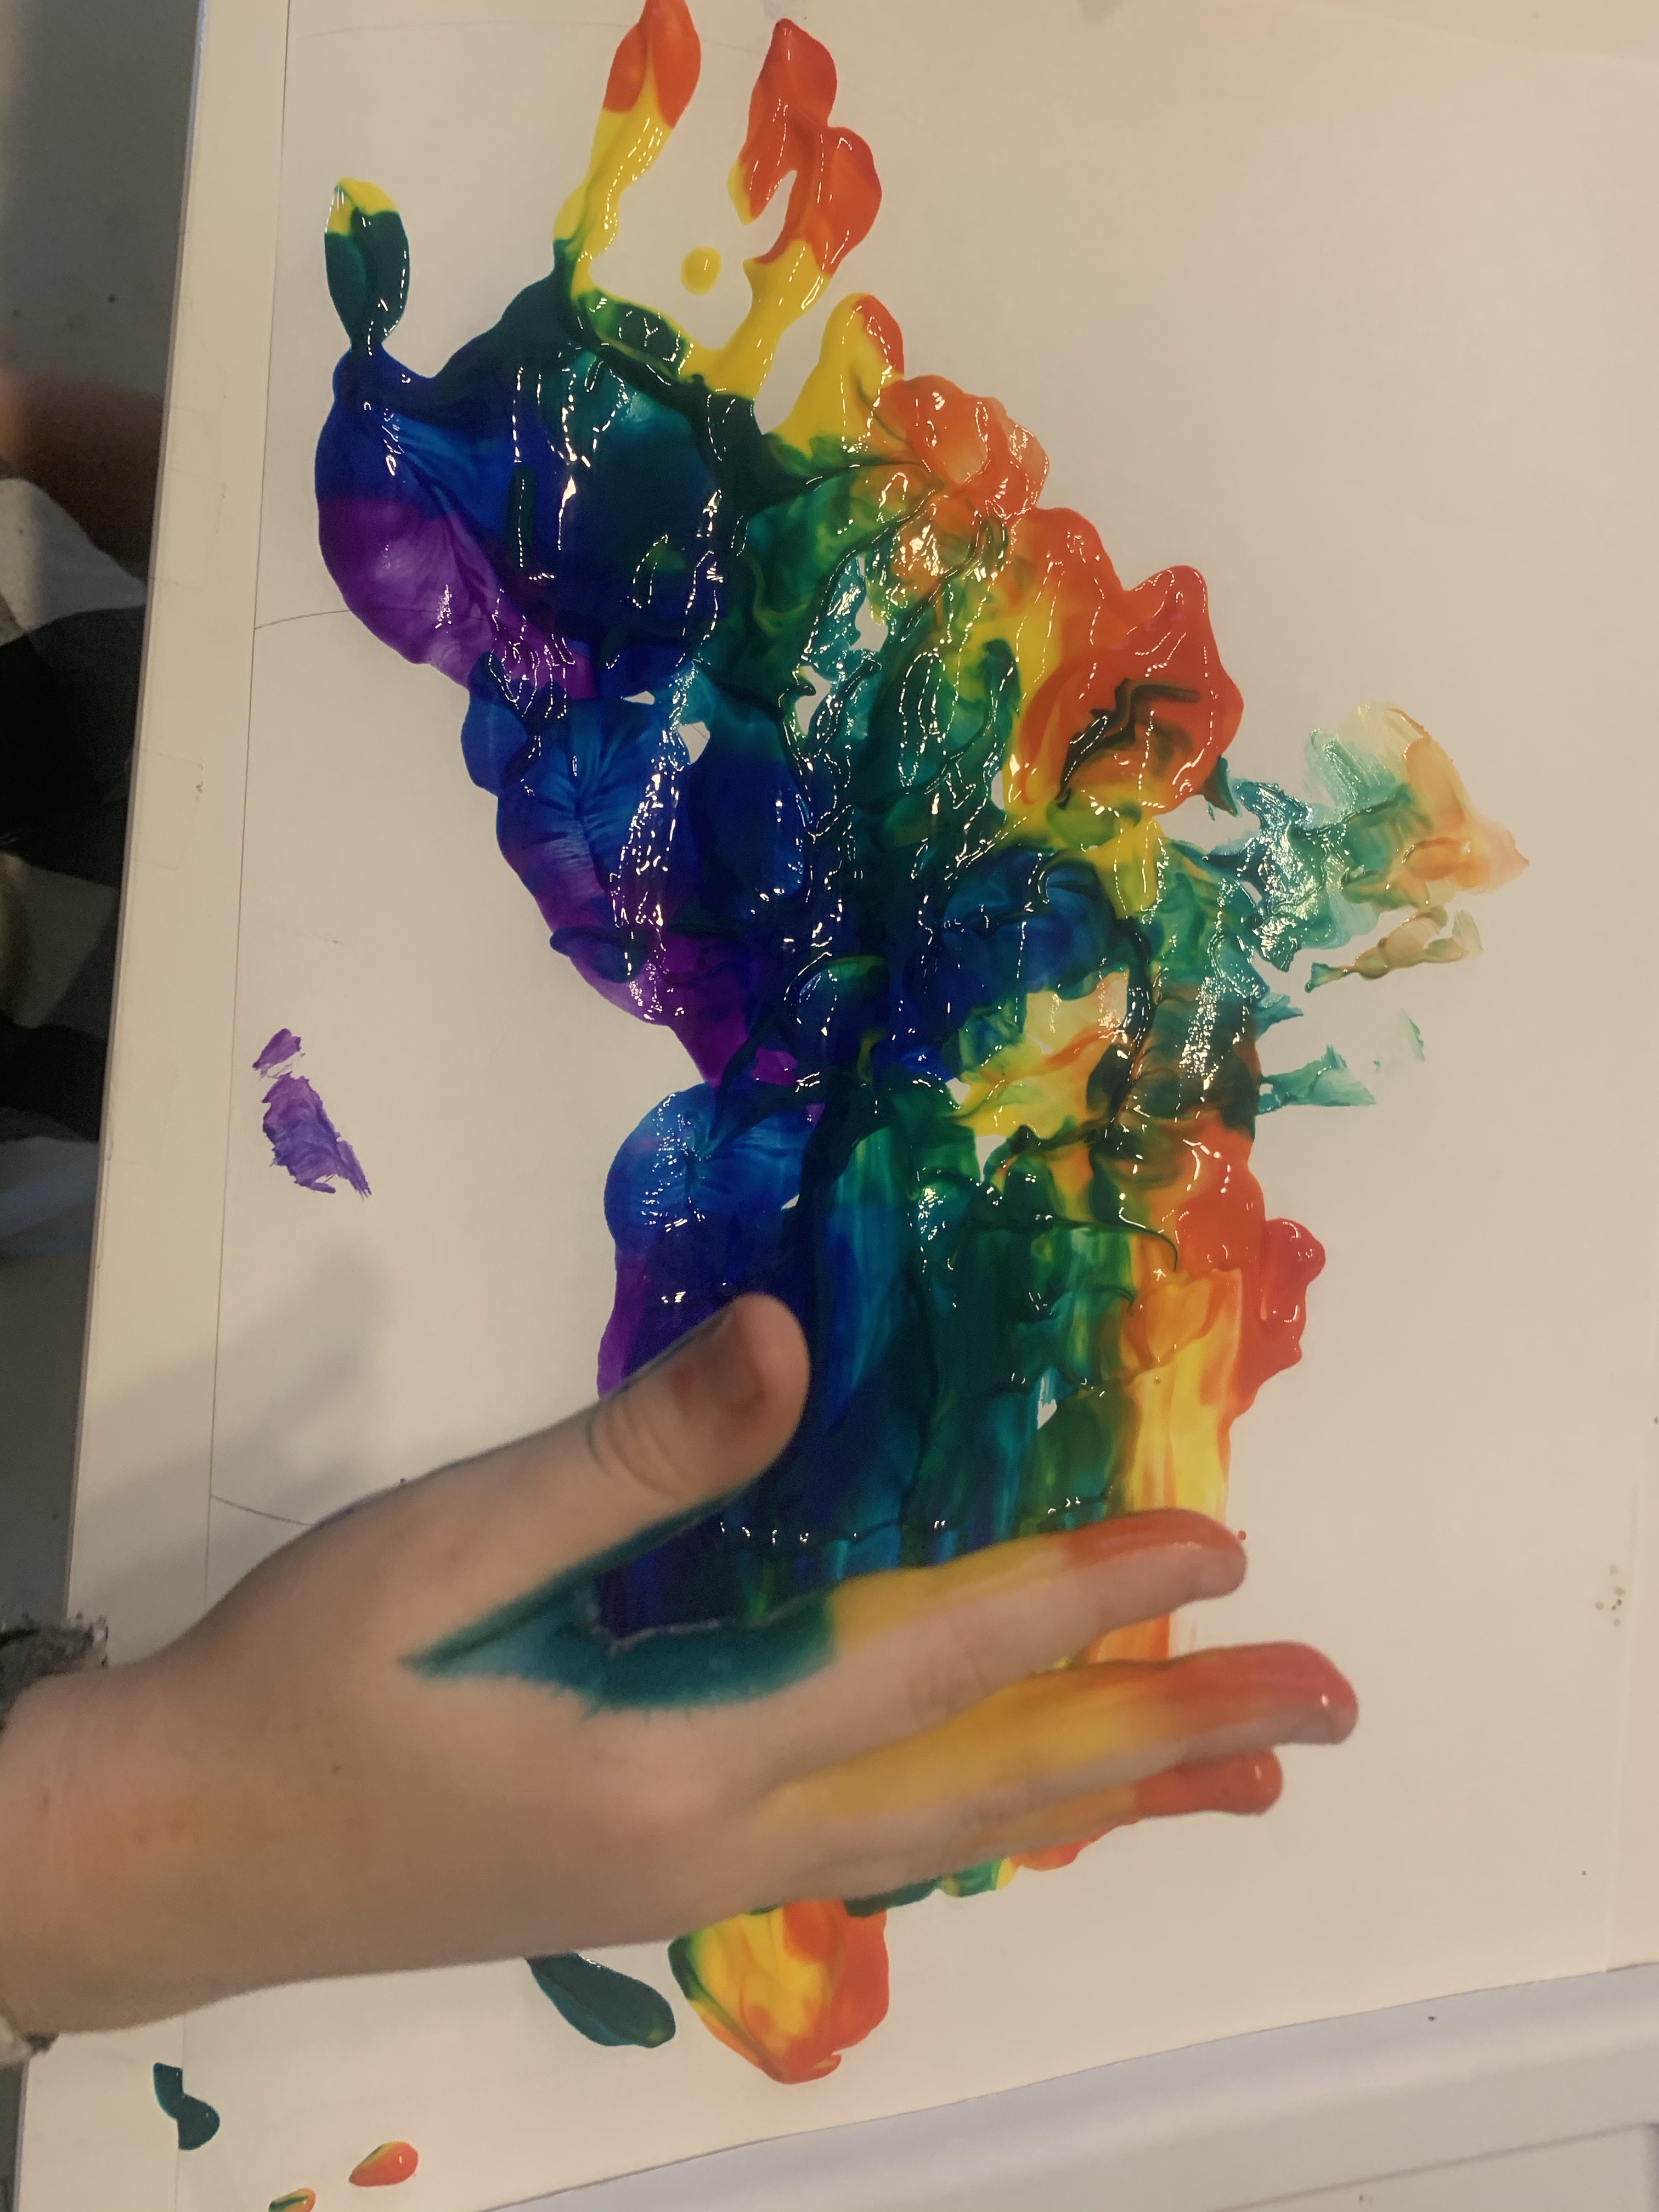
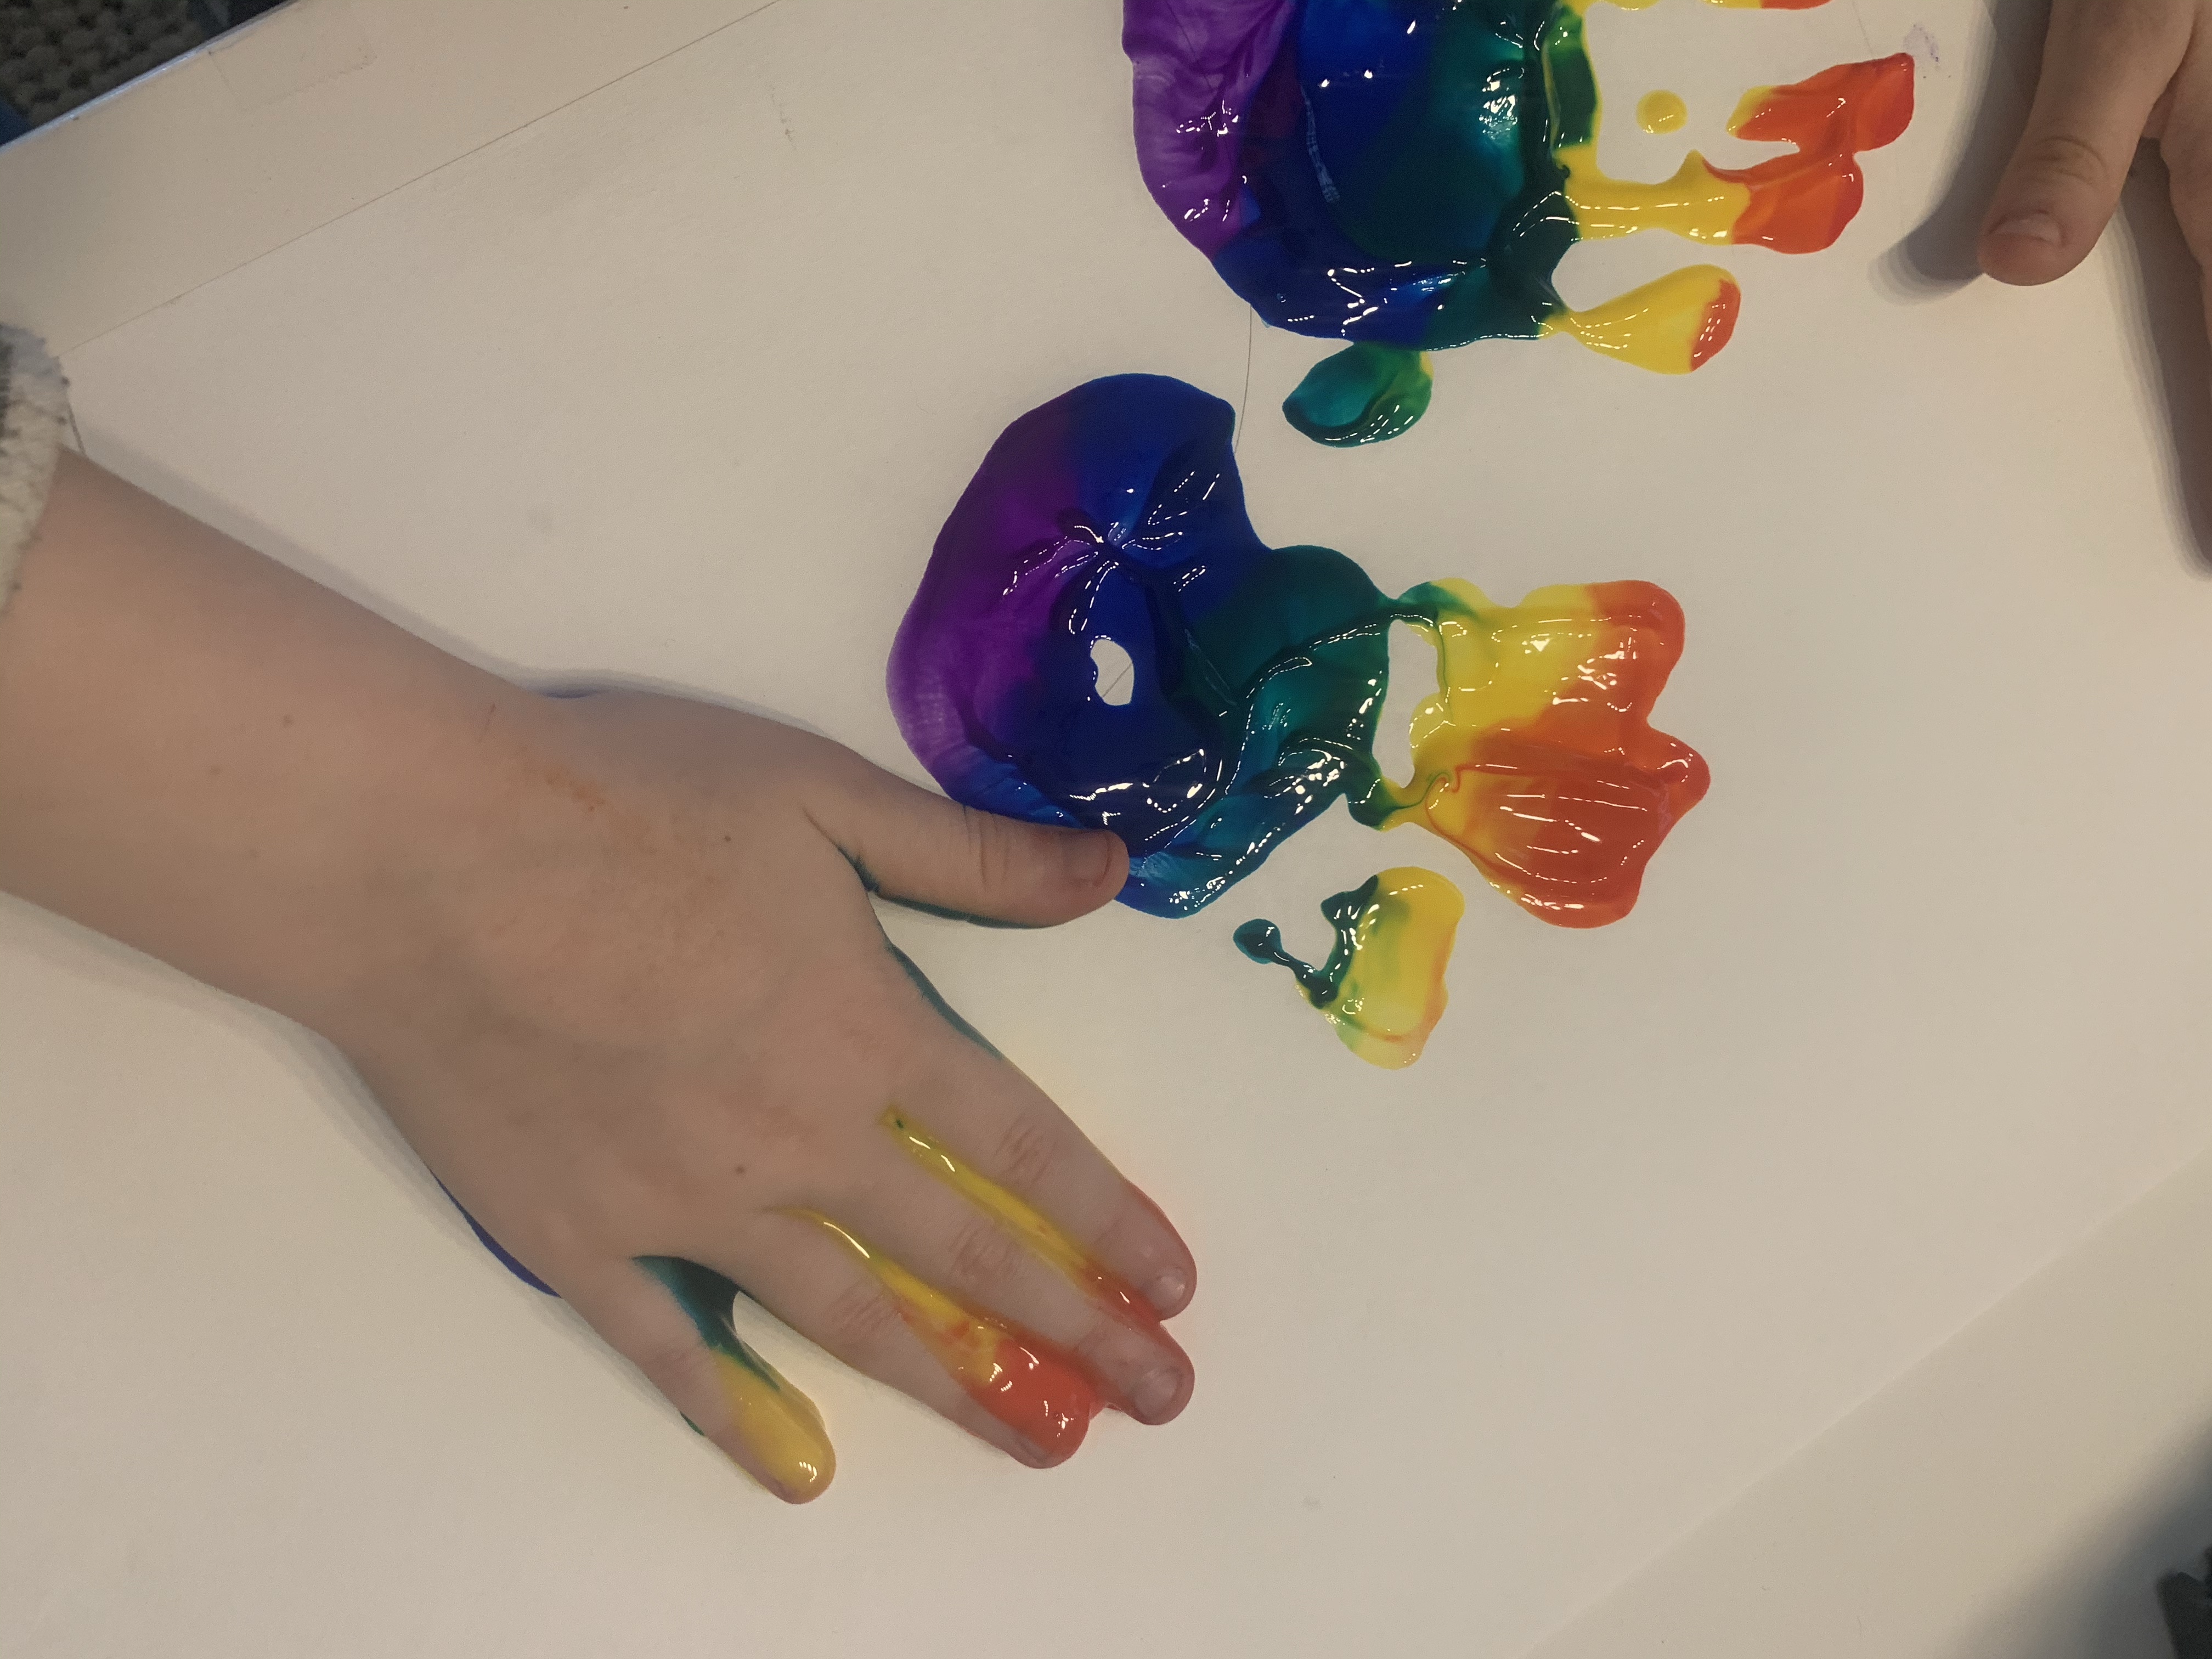
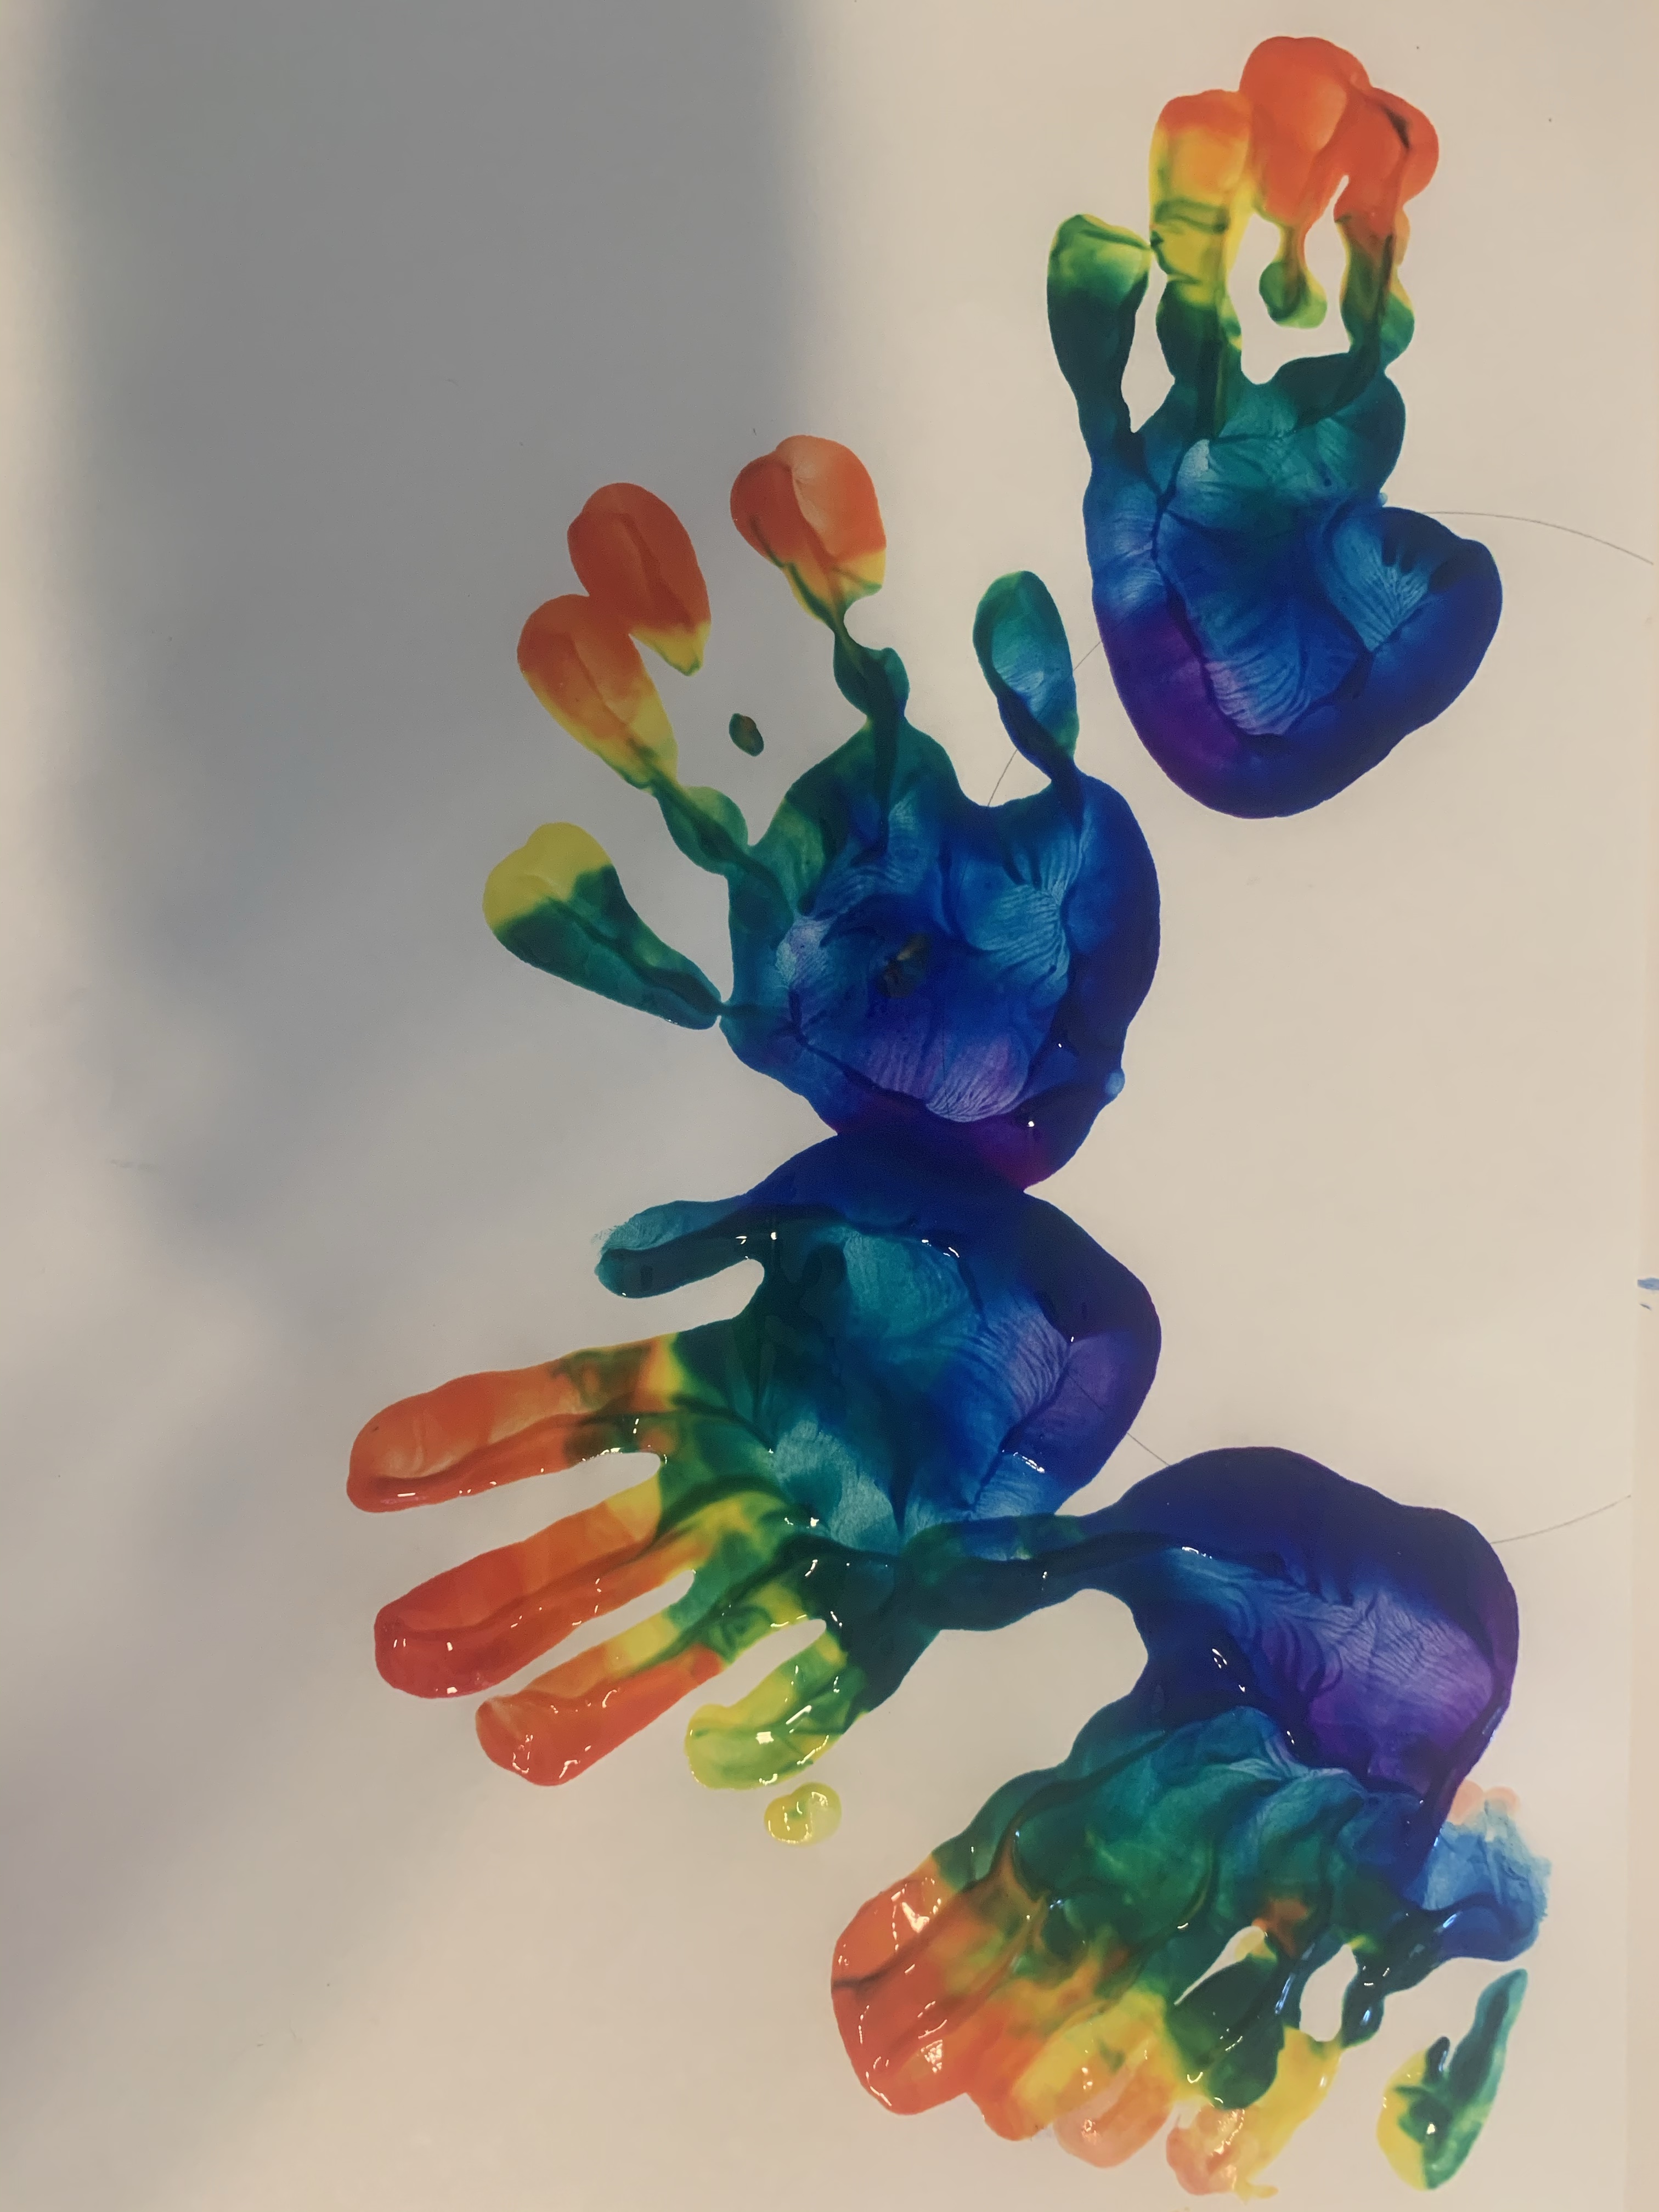
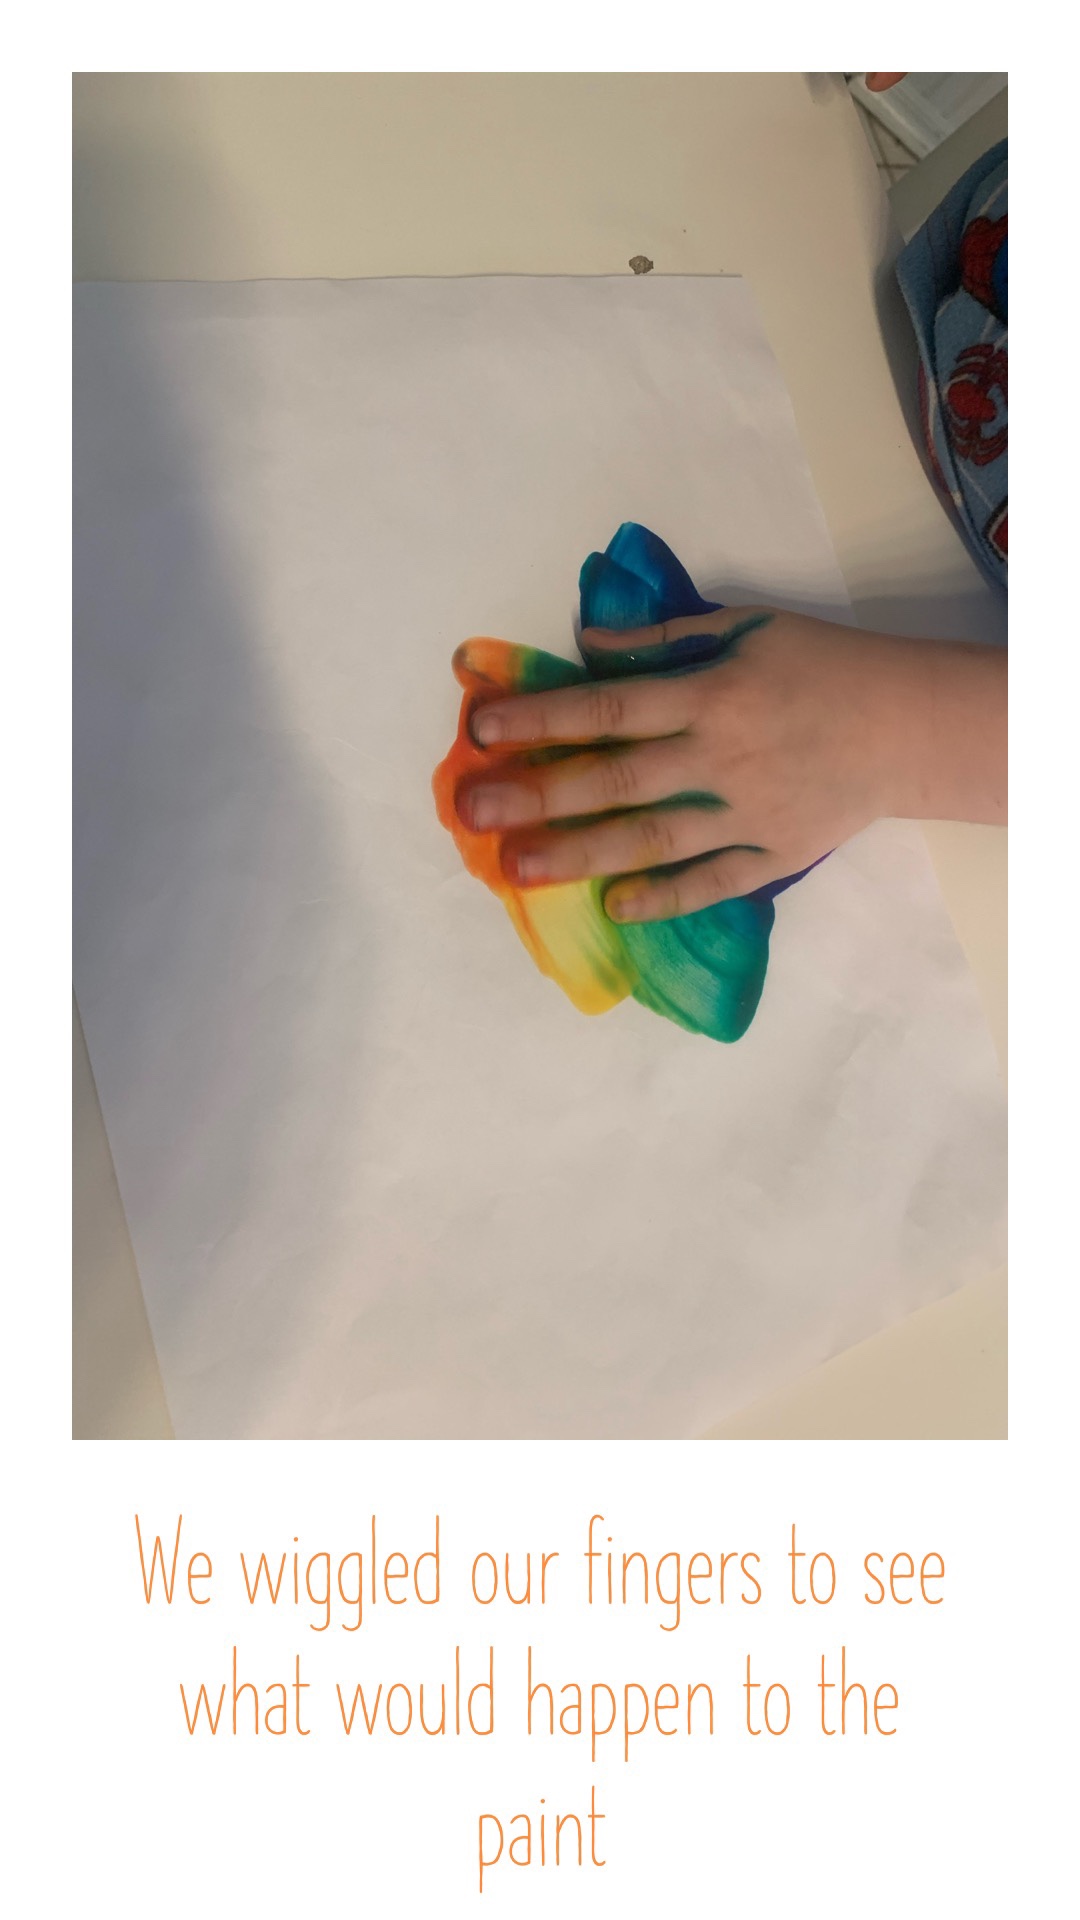
His second attempt was much better. He made some perfect hand prints on paper, then I drew him a semi circle as a guide for placing the heel of his hand. This way he could make a curve of handprints to make a full rainbow. He left too large of a gap between his handprints though, and felt he couldn’t fill them in because the color lines wouldn’t match up. I was happy if he was happy and he liked how it looked with the gaps. He then spent some time trying out moving his fingers on the paper whilst covered in paint, to see what happened. He’s so thoughtful when he’s doing crafts. He discussed the colors, and the feeling of the paint. Then trotted off to wash his hands independently. (Unlike William who just reached to smear on his shirt once he was done!)
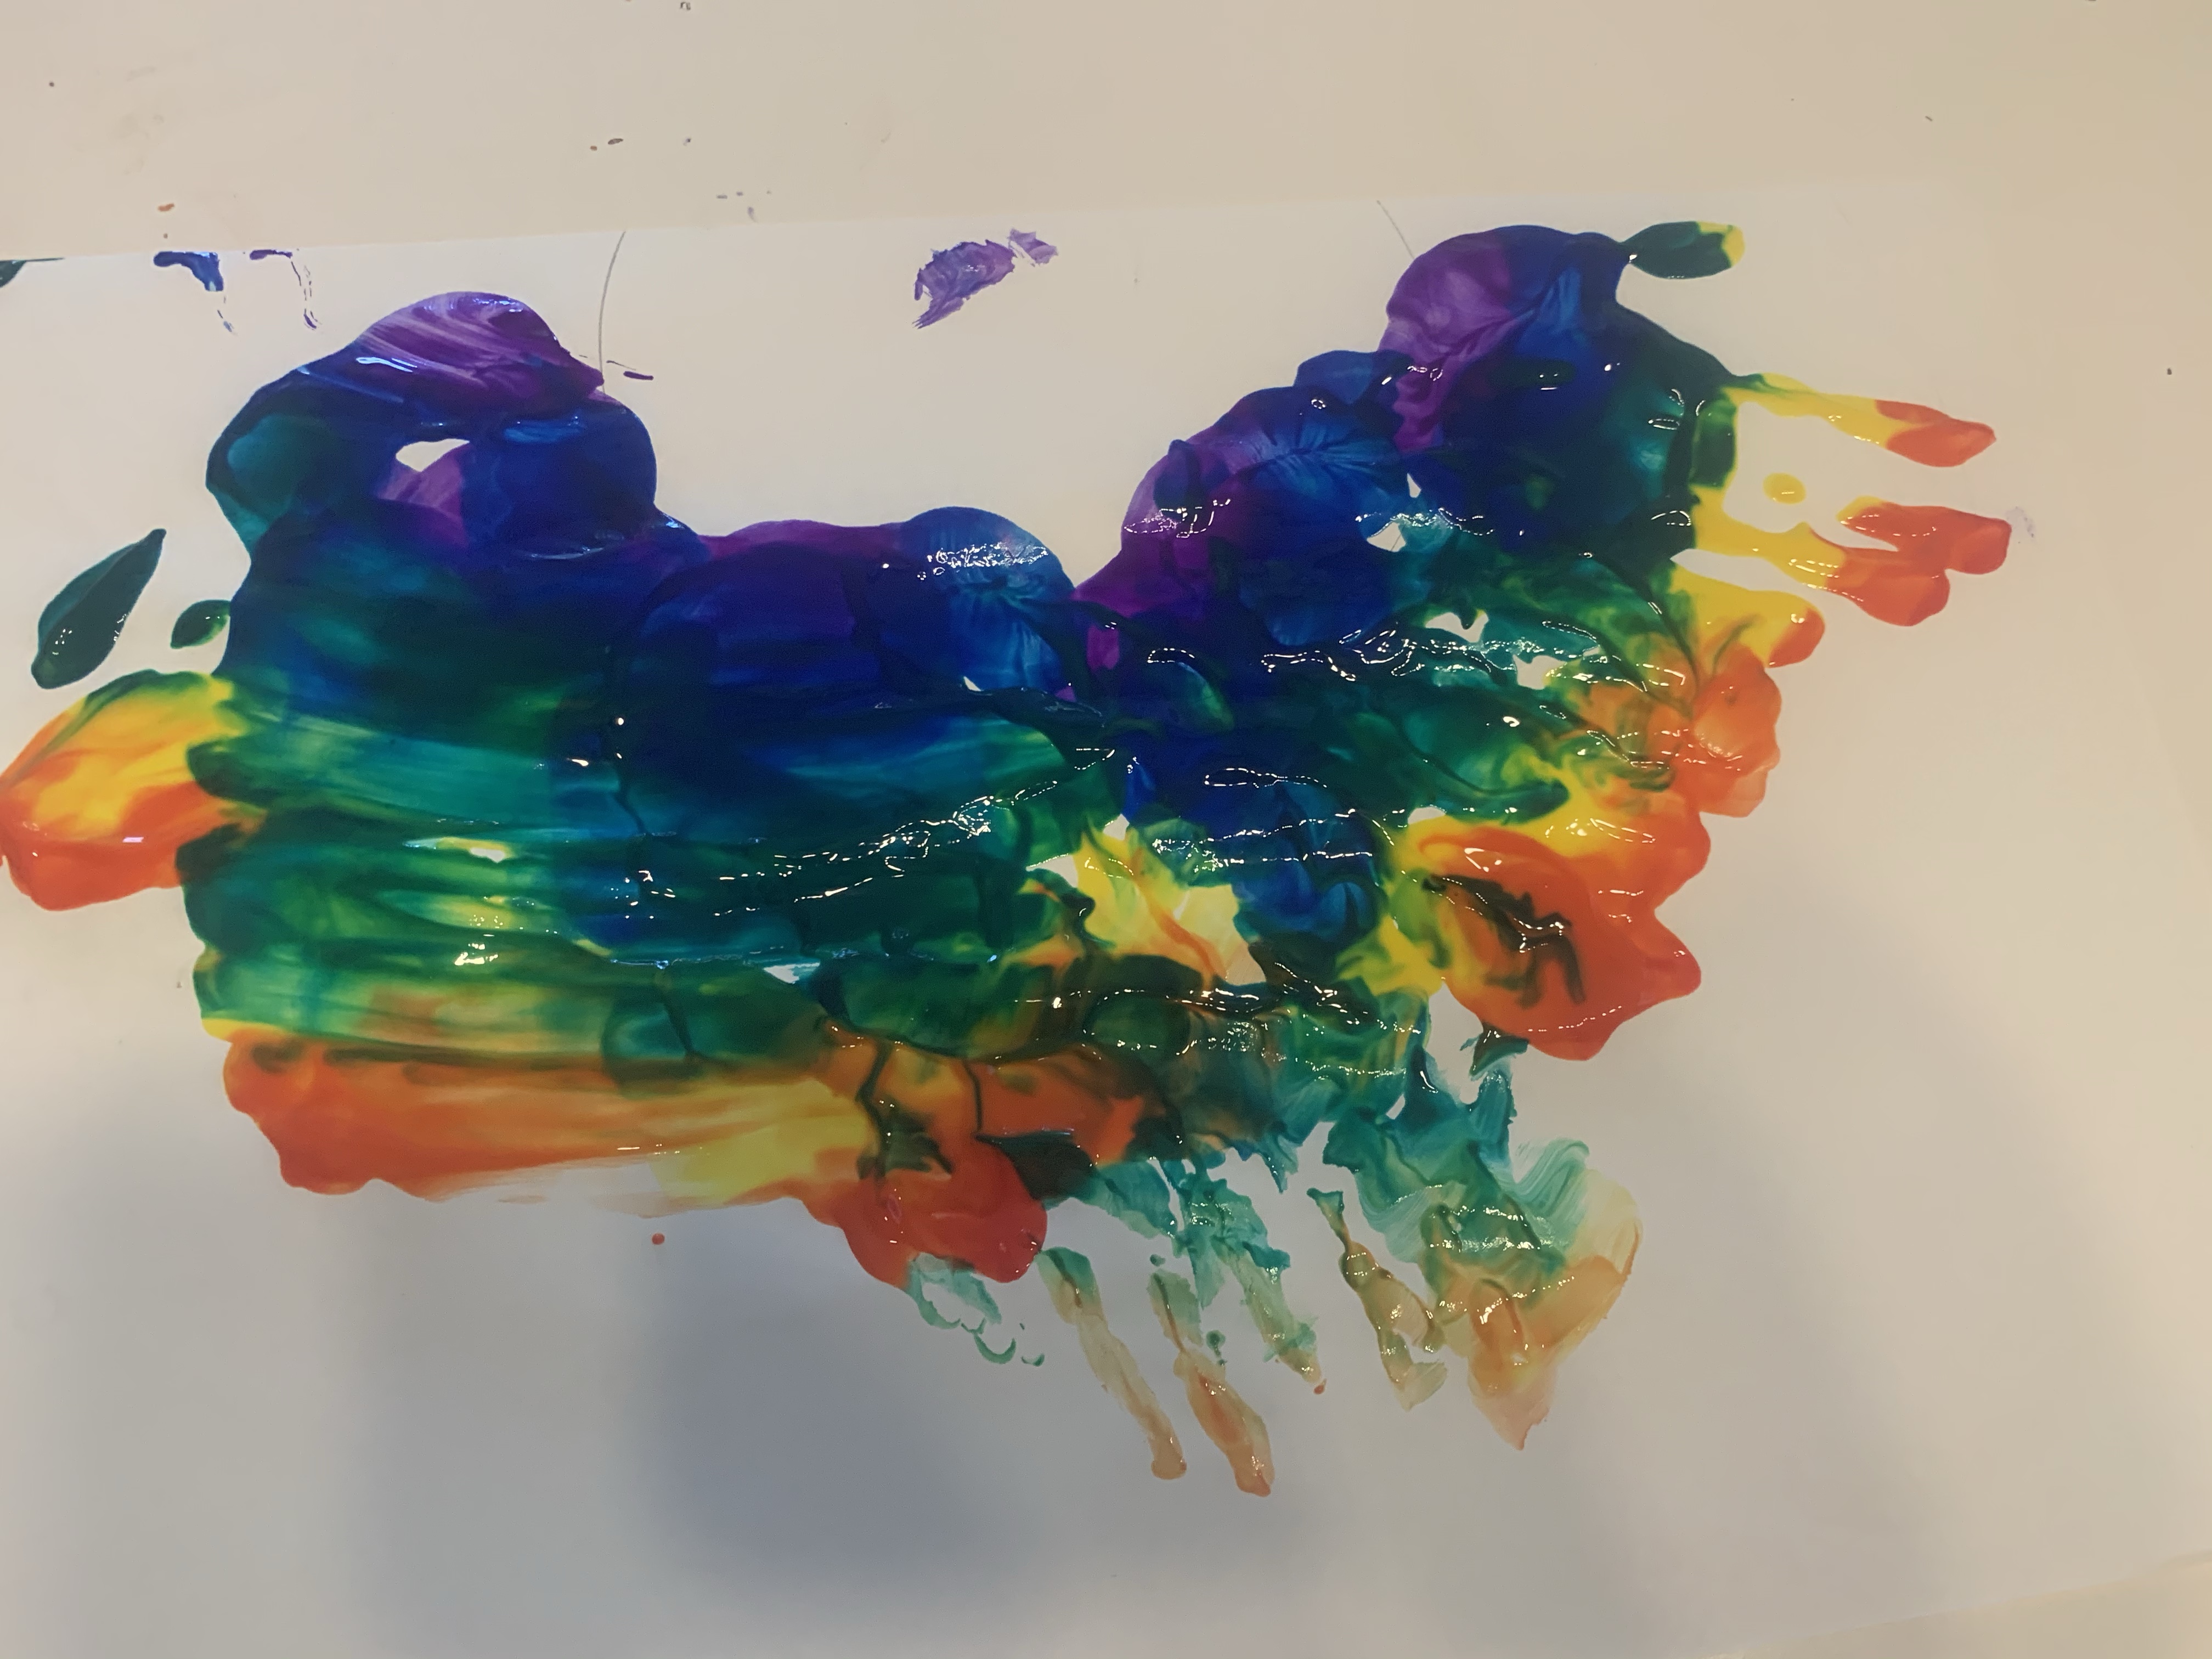
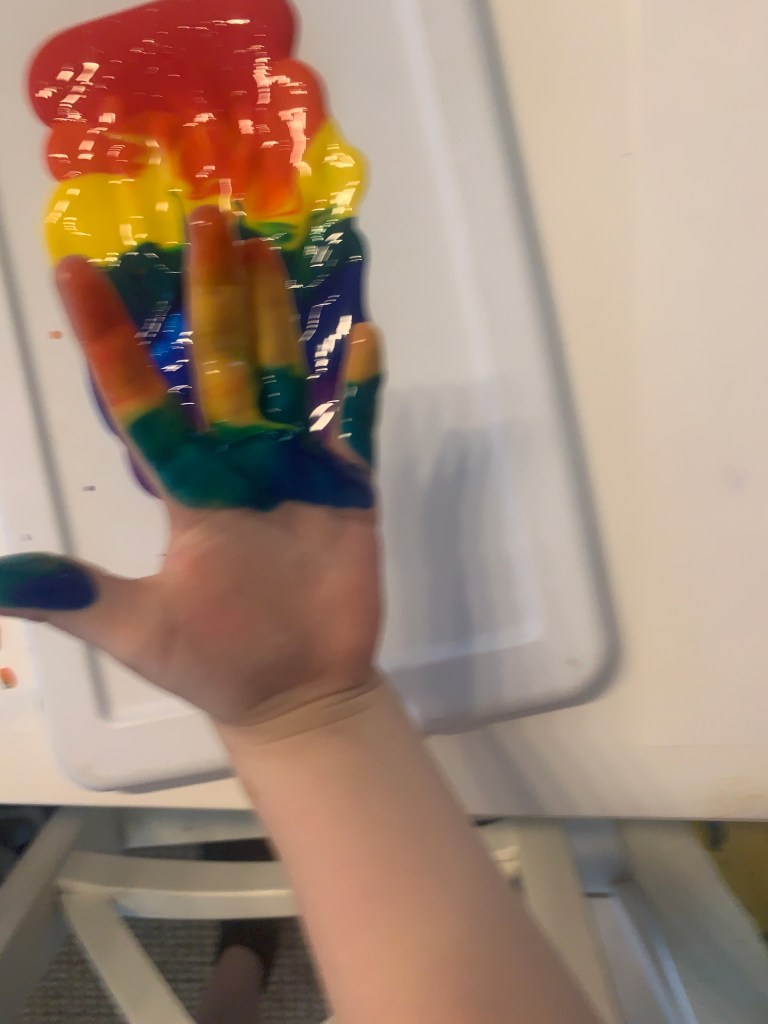
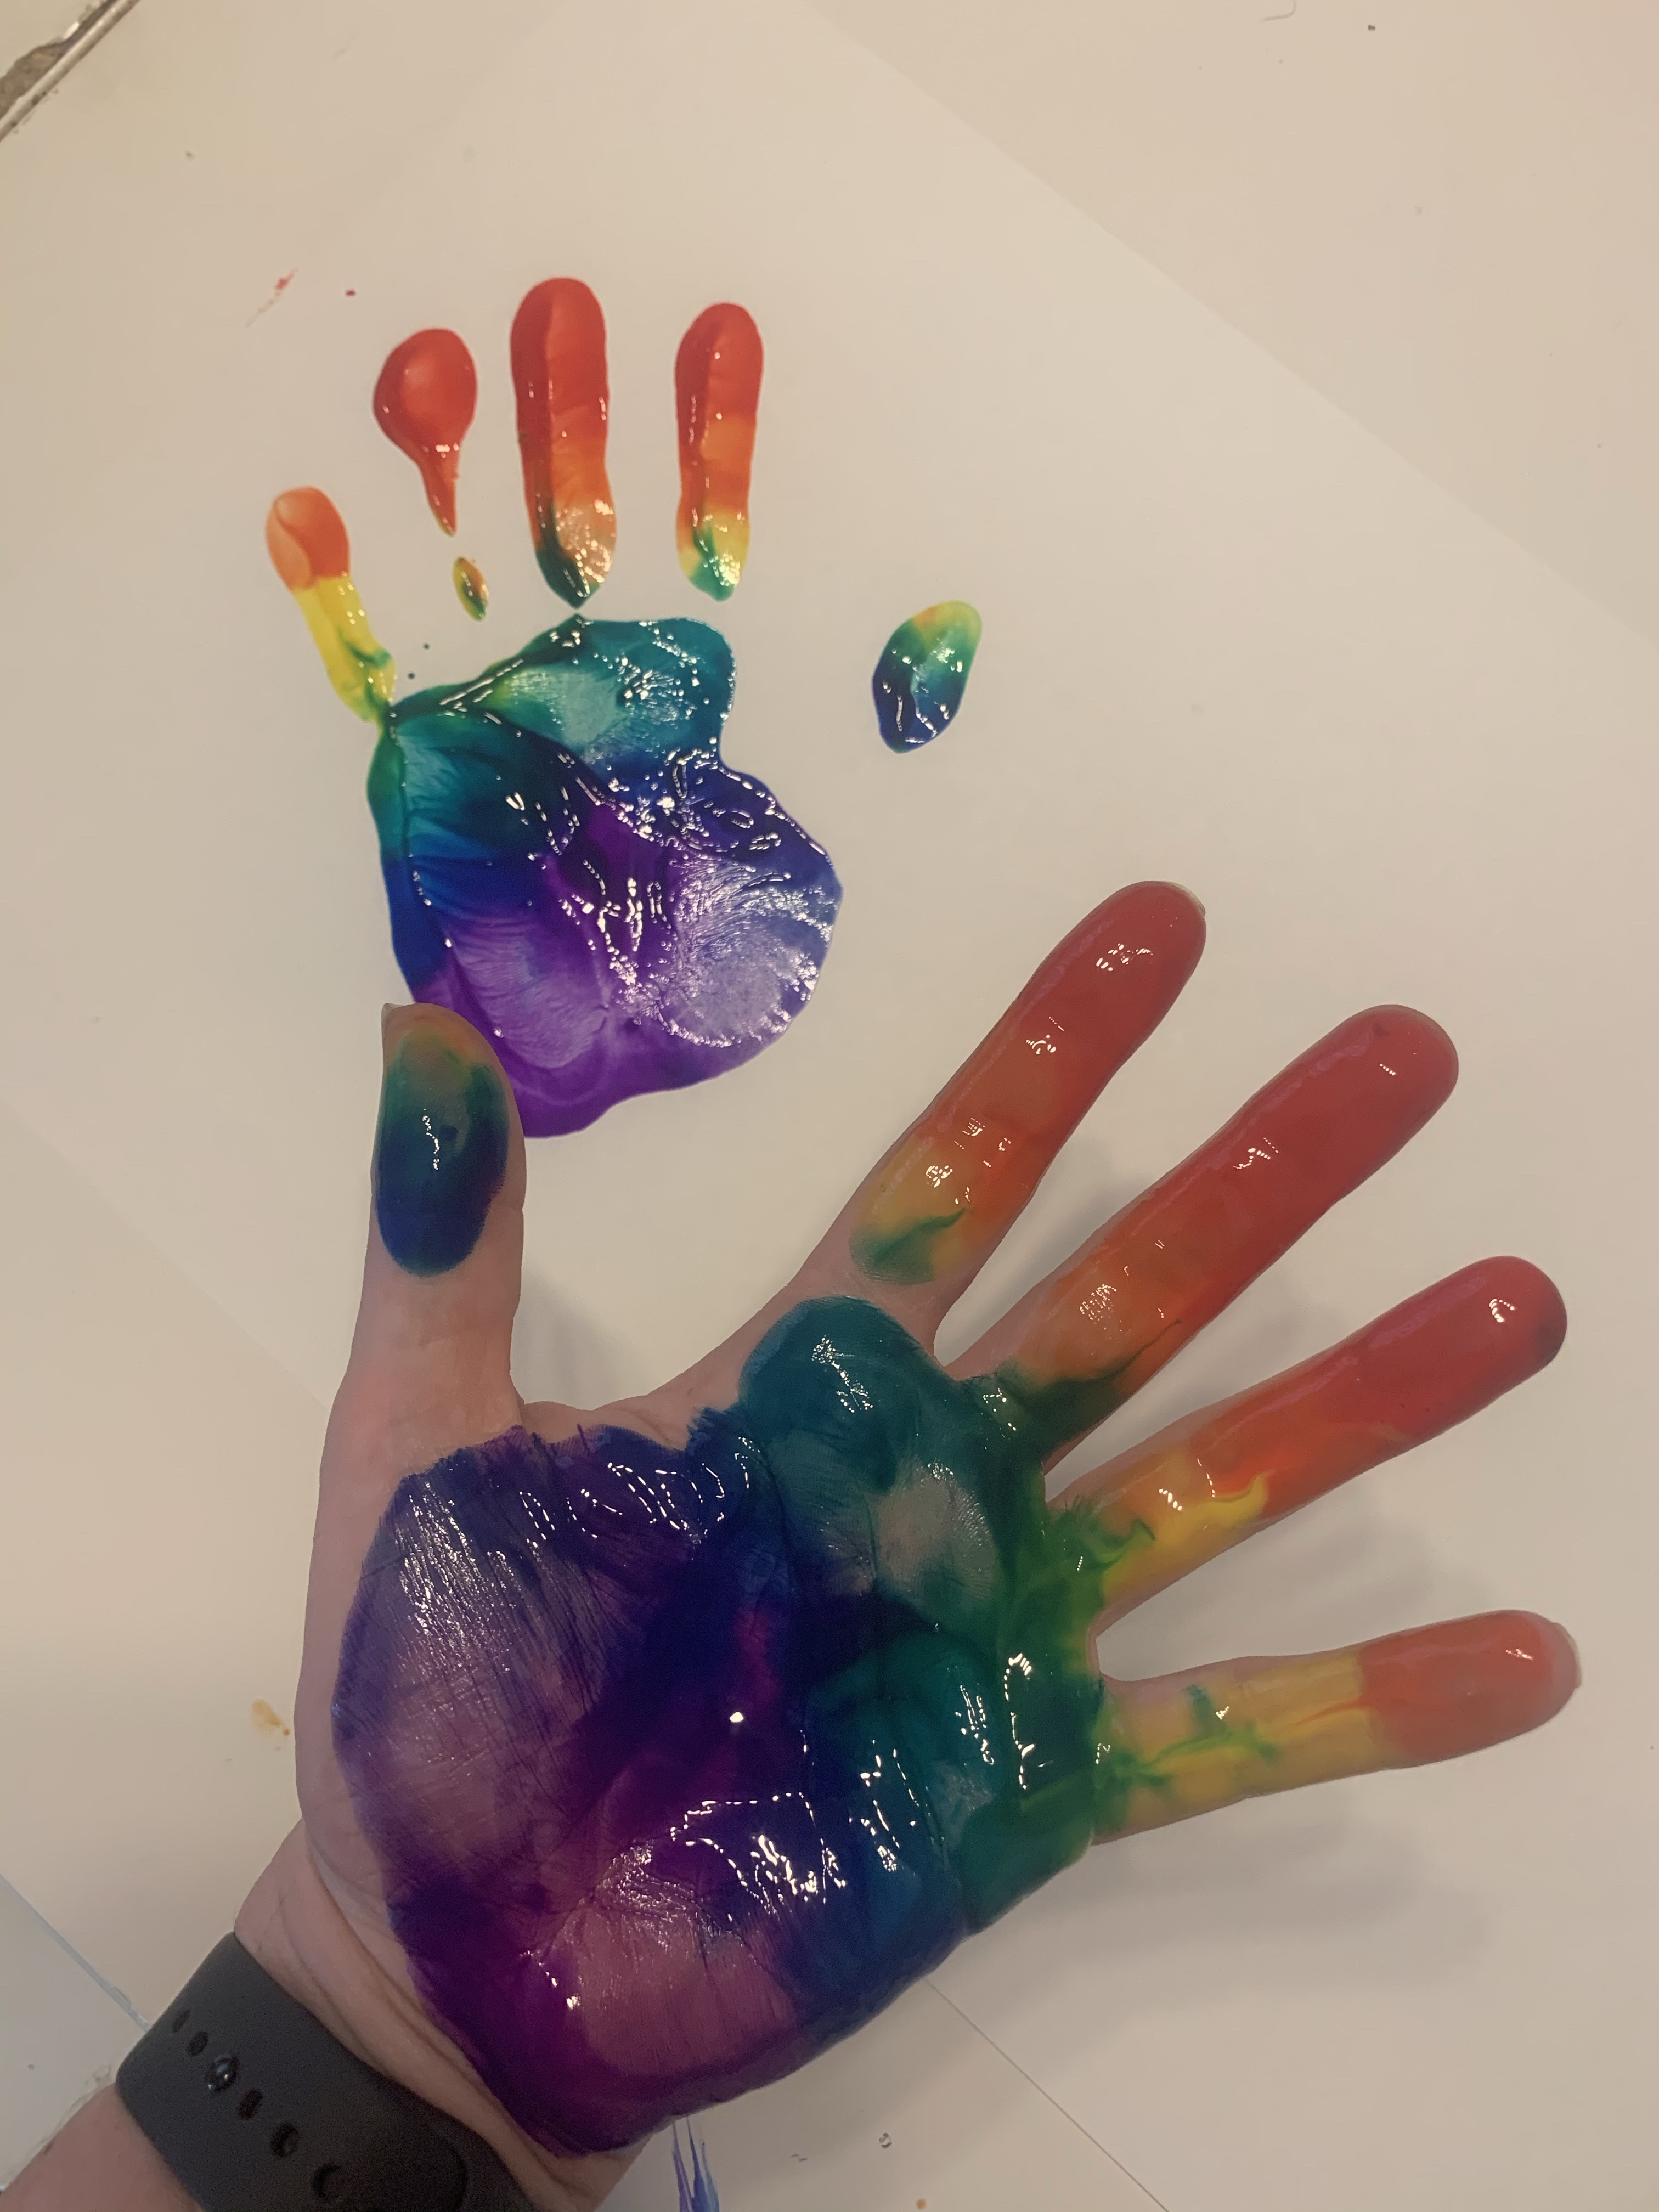
Our final participant was meant to be Arthur. I rolled up his sleeves and brought him towards the paint. I’d mentally prepped for it to be extraordinarily messy. I showed him my hand with my fingers splayed and asked him to show me his hand like that. At which point he made two fists. Refused to release them, and burst into tears. So no Arth art…. but also no cleanup. So a bit of a win really. As there was paint left I decided to do my own handprint. It was just as satisfying as I thought it would be, although my hands look like giant Hagrid hands!
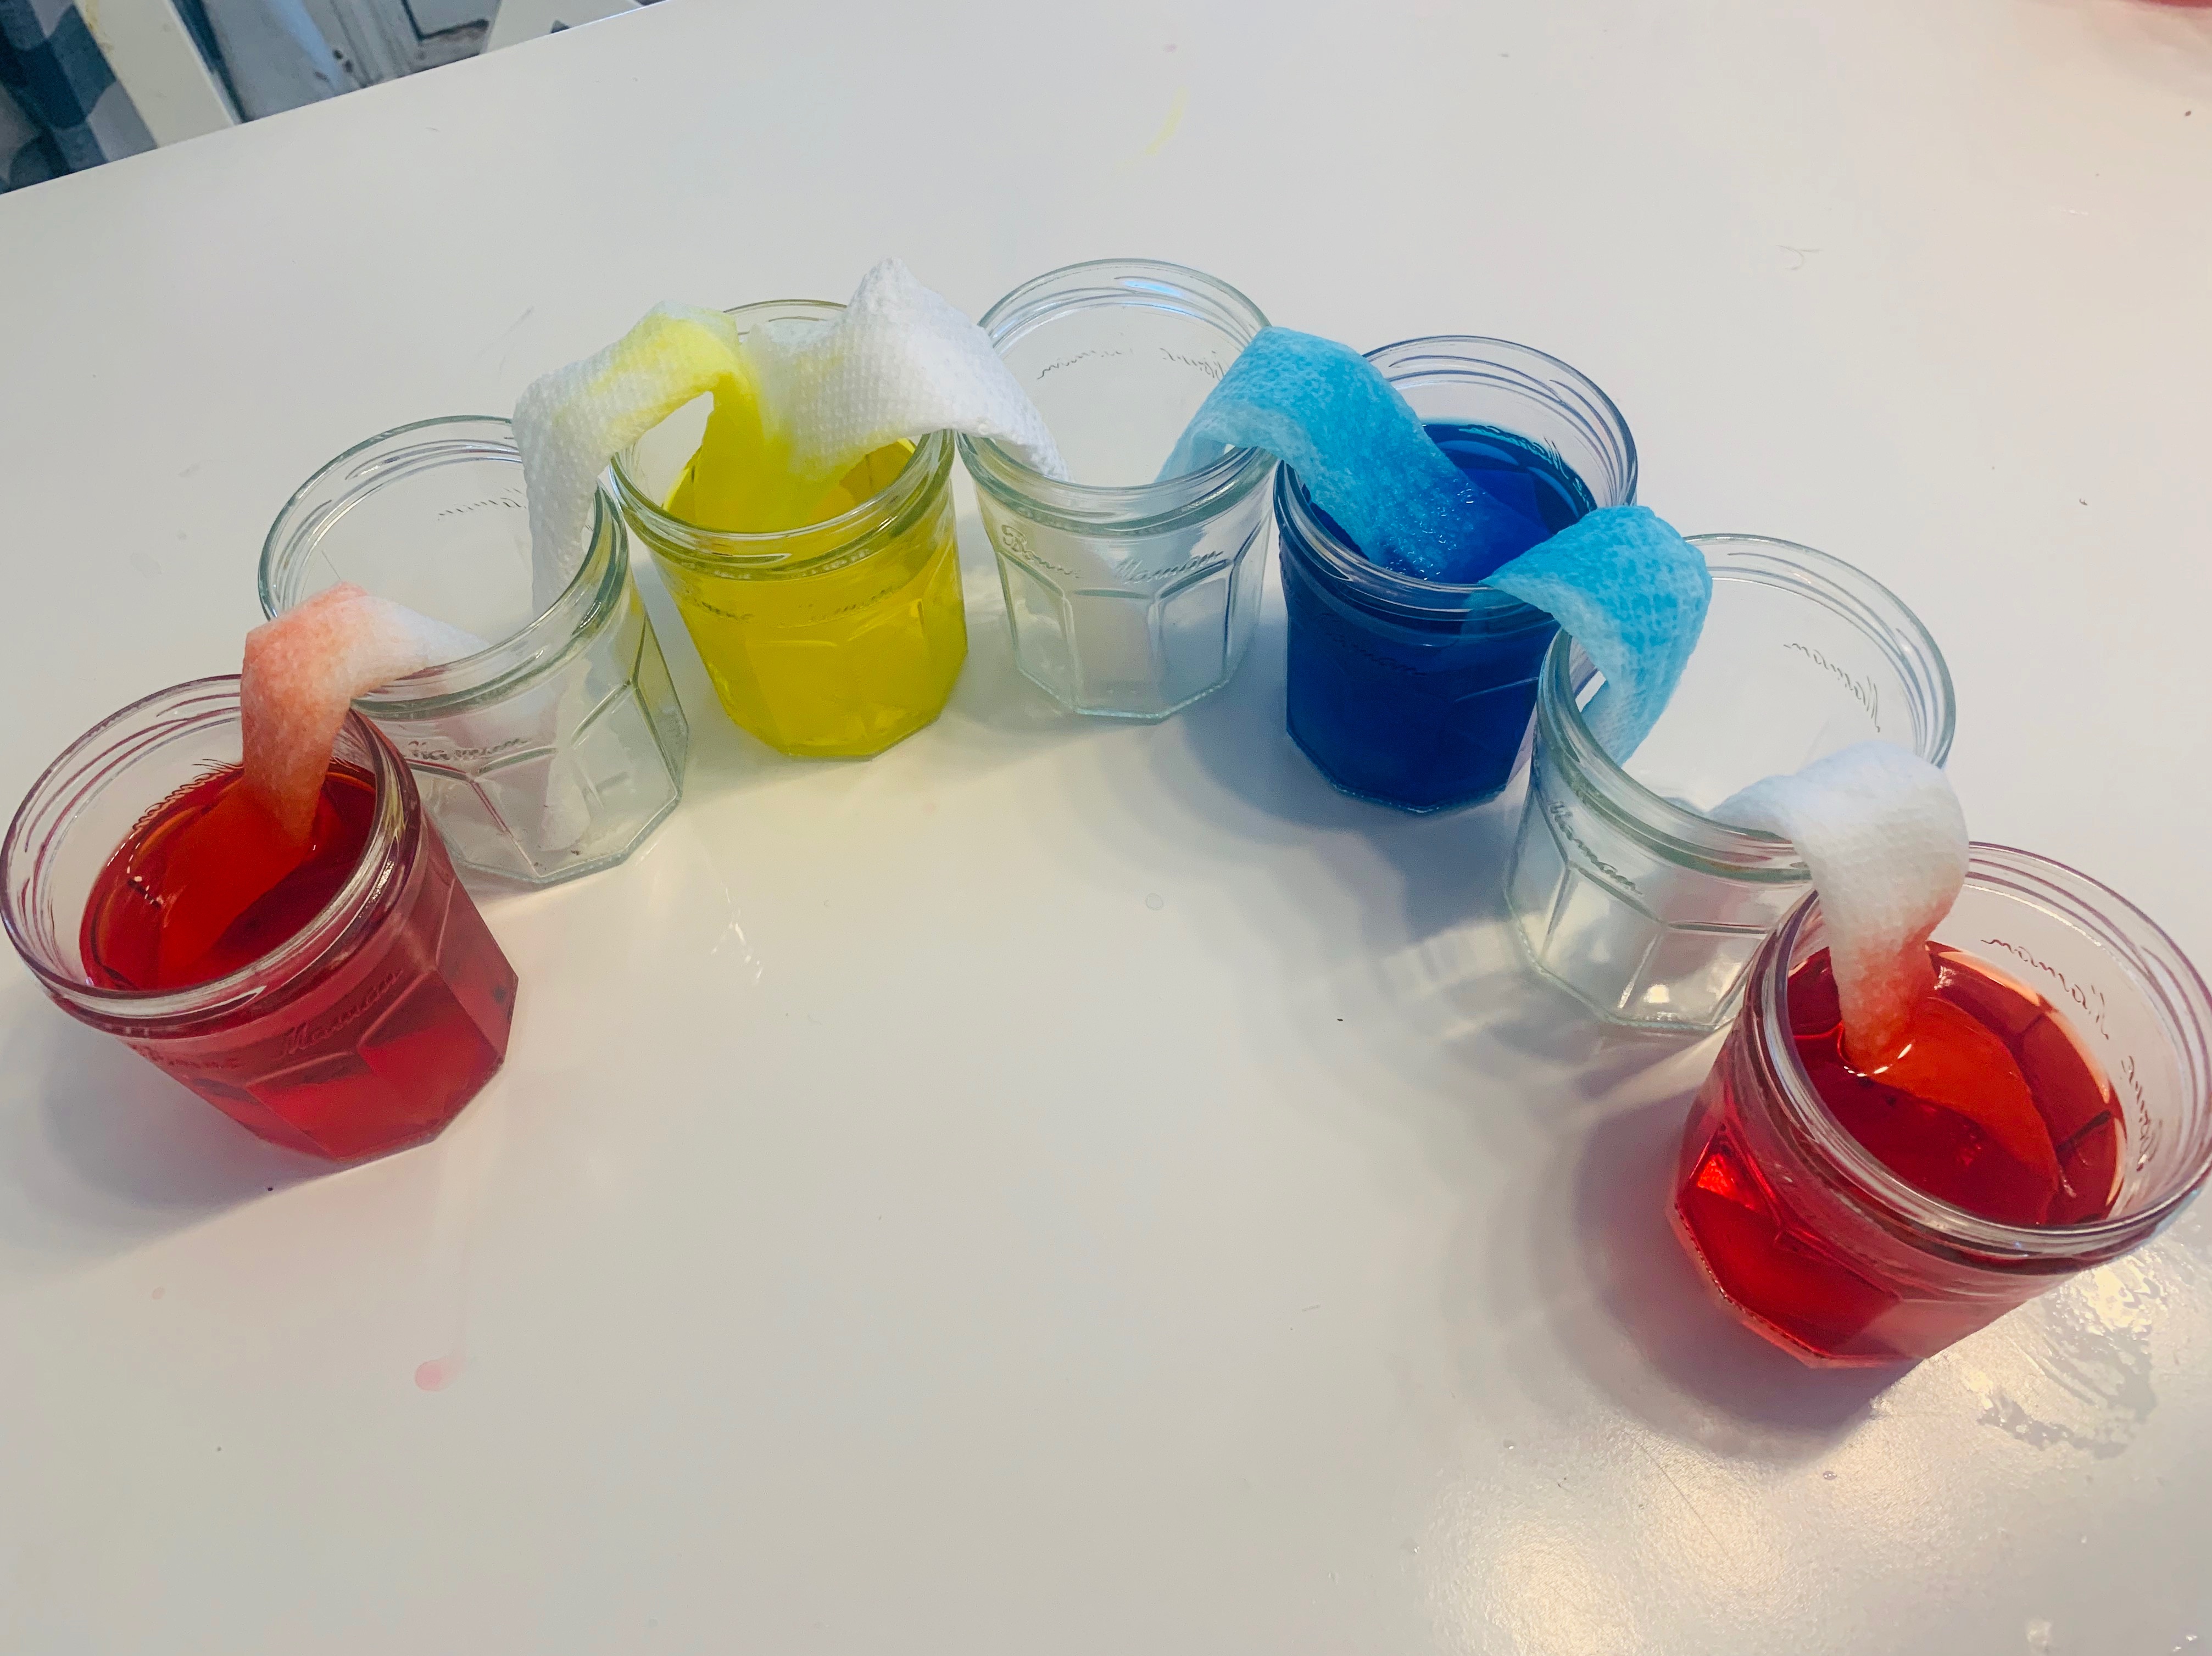
We did science for our educational activity. I’ve had SO many recommendations for the walking water science experiment since I told pals I was doing a rainbow week. It didn’t disappoint. You’ll need 6 or 7 jars (or 14 if you’ve got two little boys who refuse to share experiments). Water, kitchen roll/paper towel and food coloring. I also found a really great free printable for predictions and observations. I’ve linked it below. It’s not necessary, but it was an enjoyable addition.
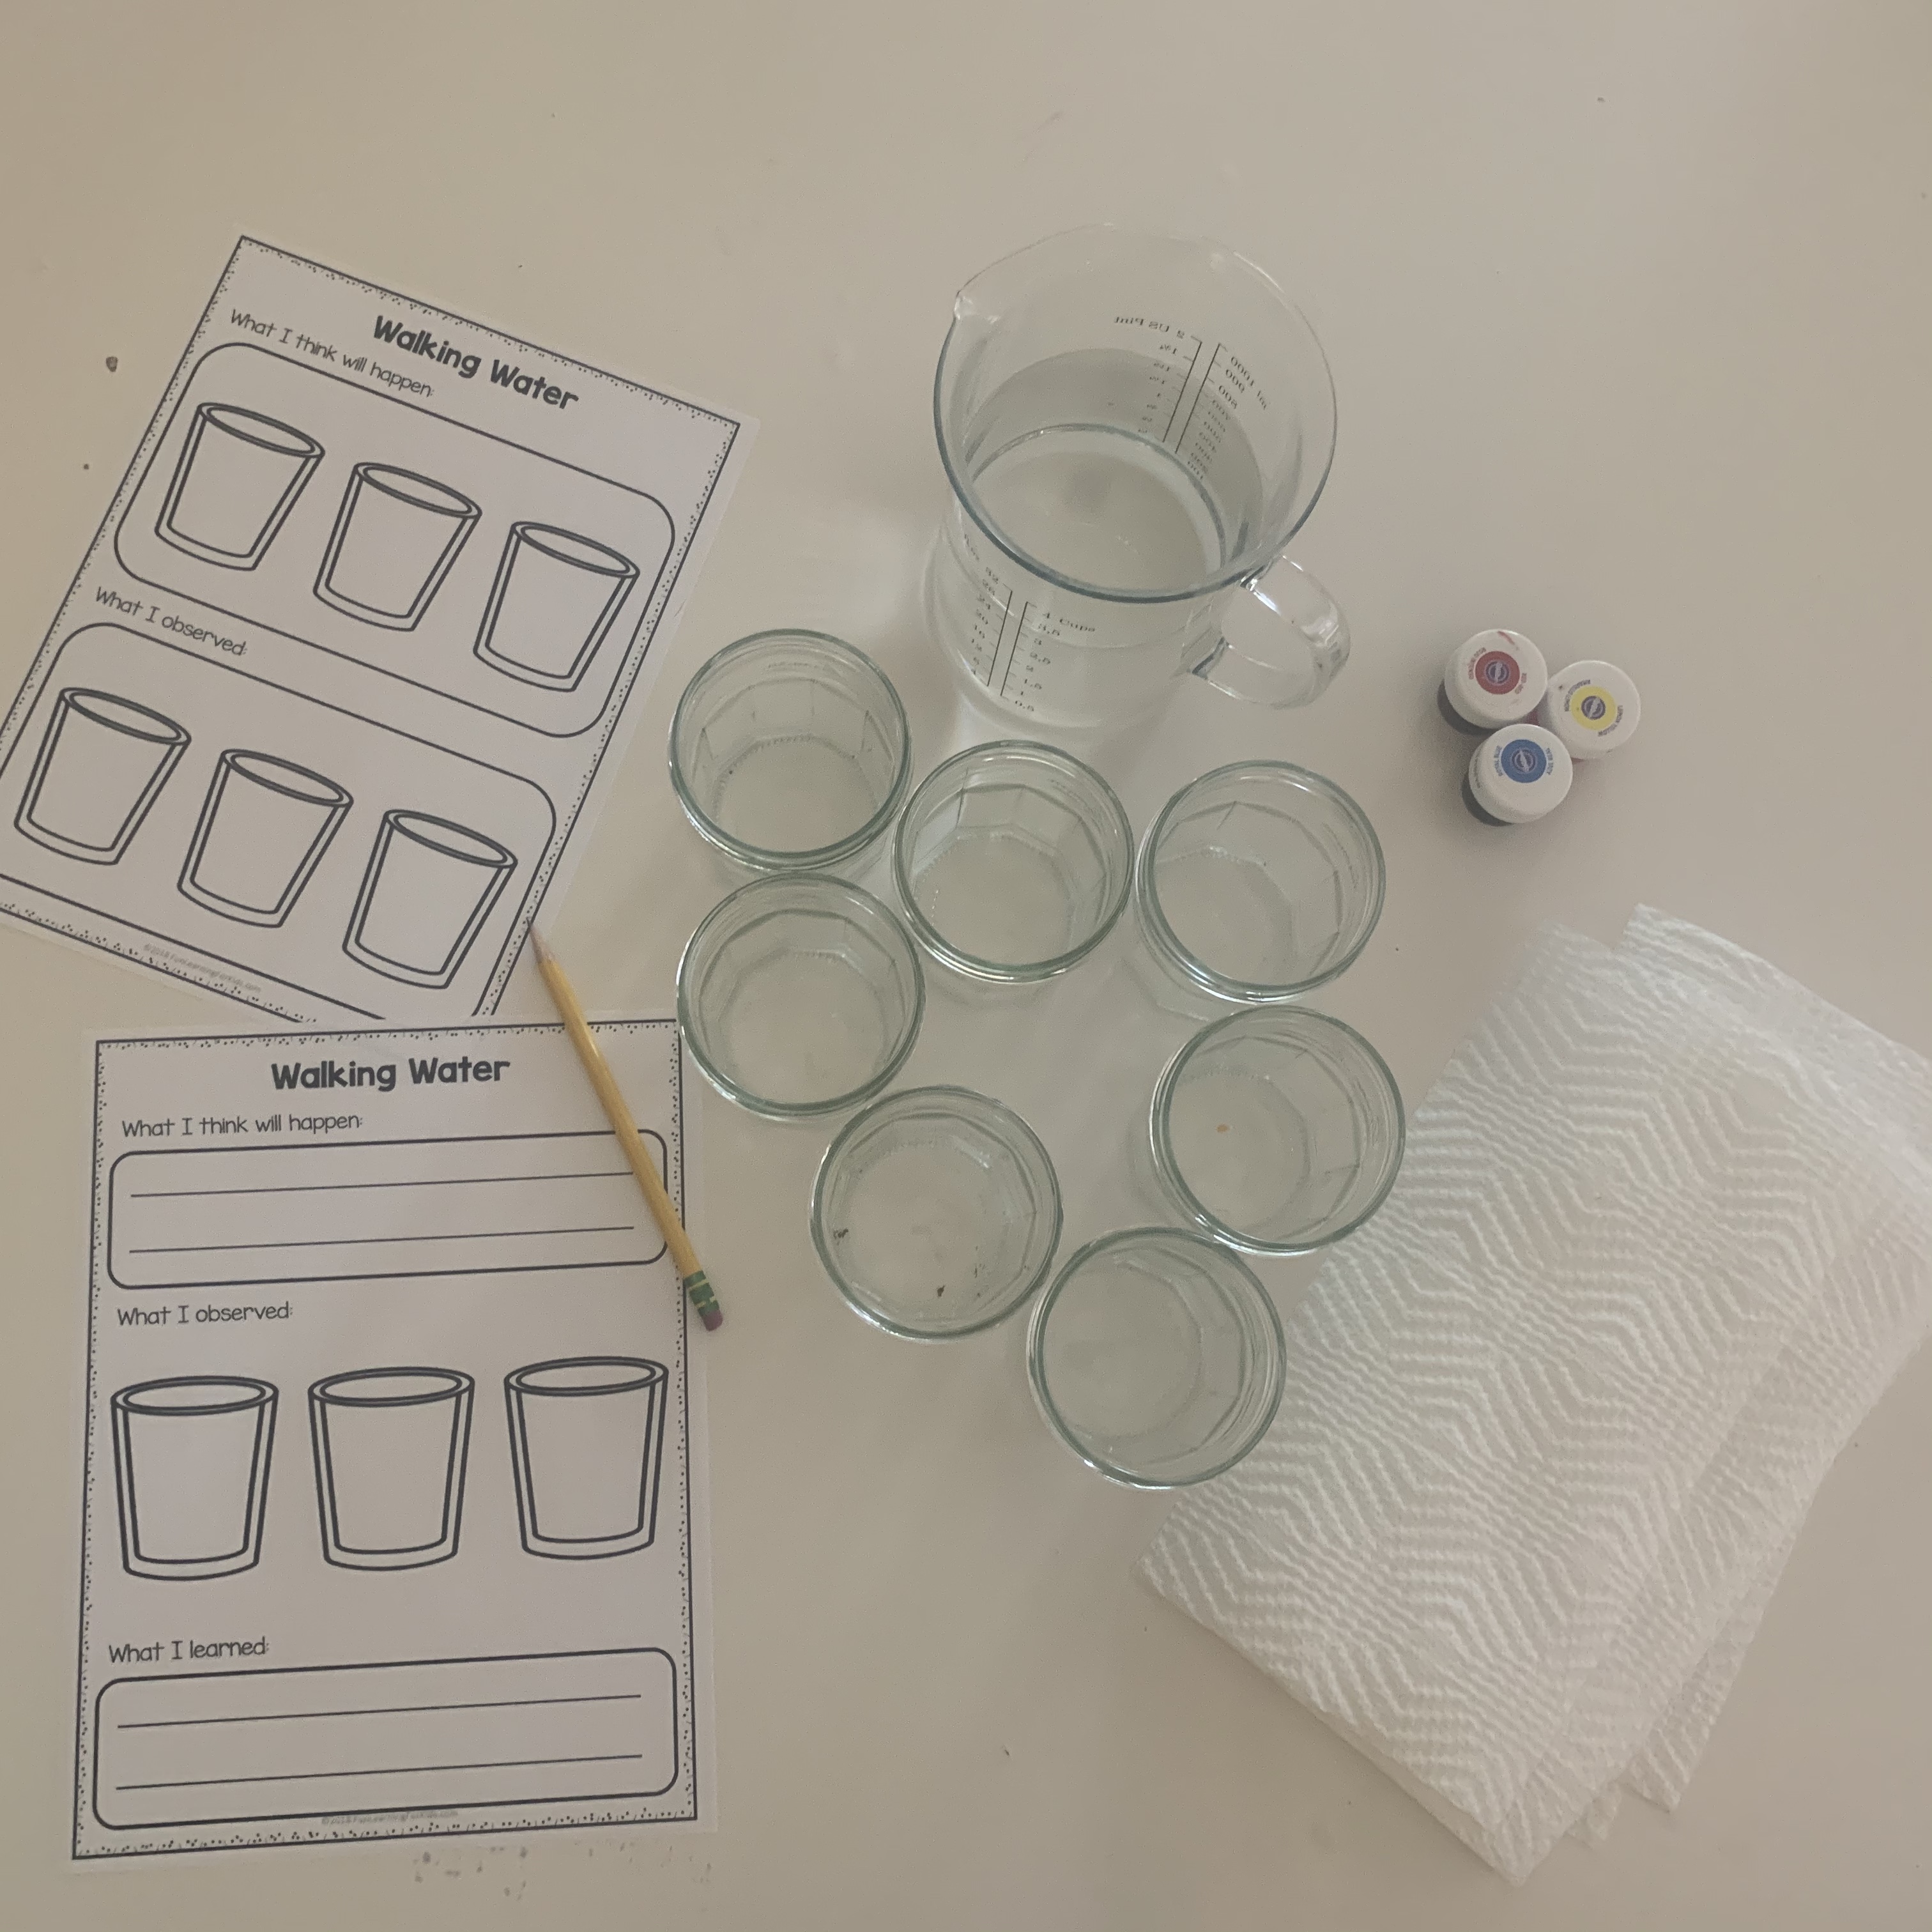
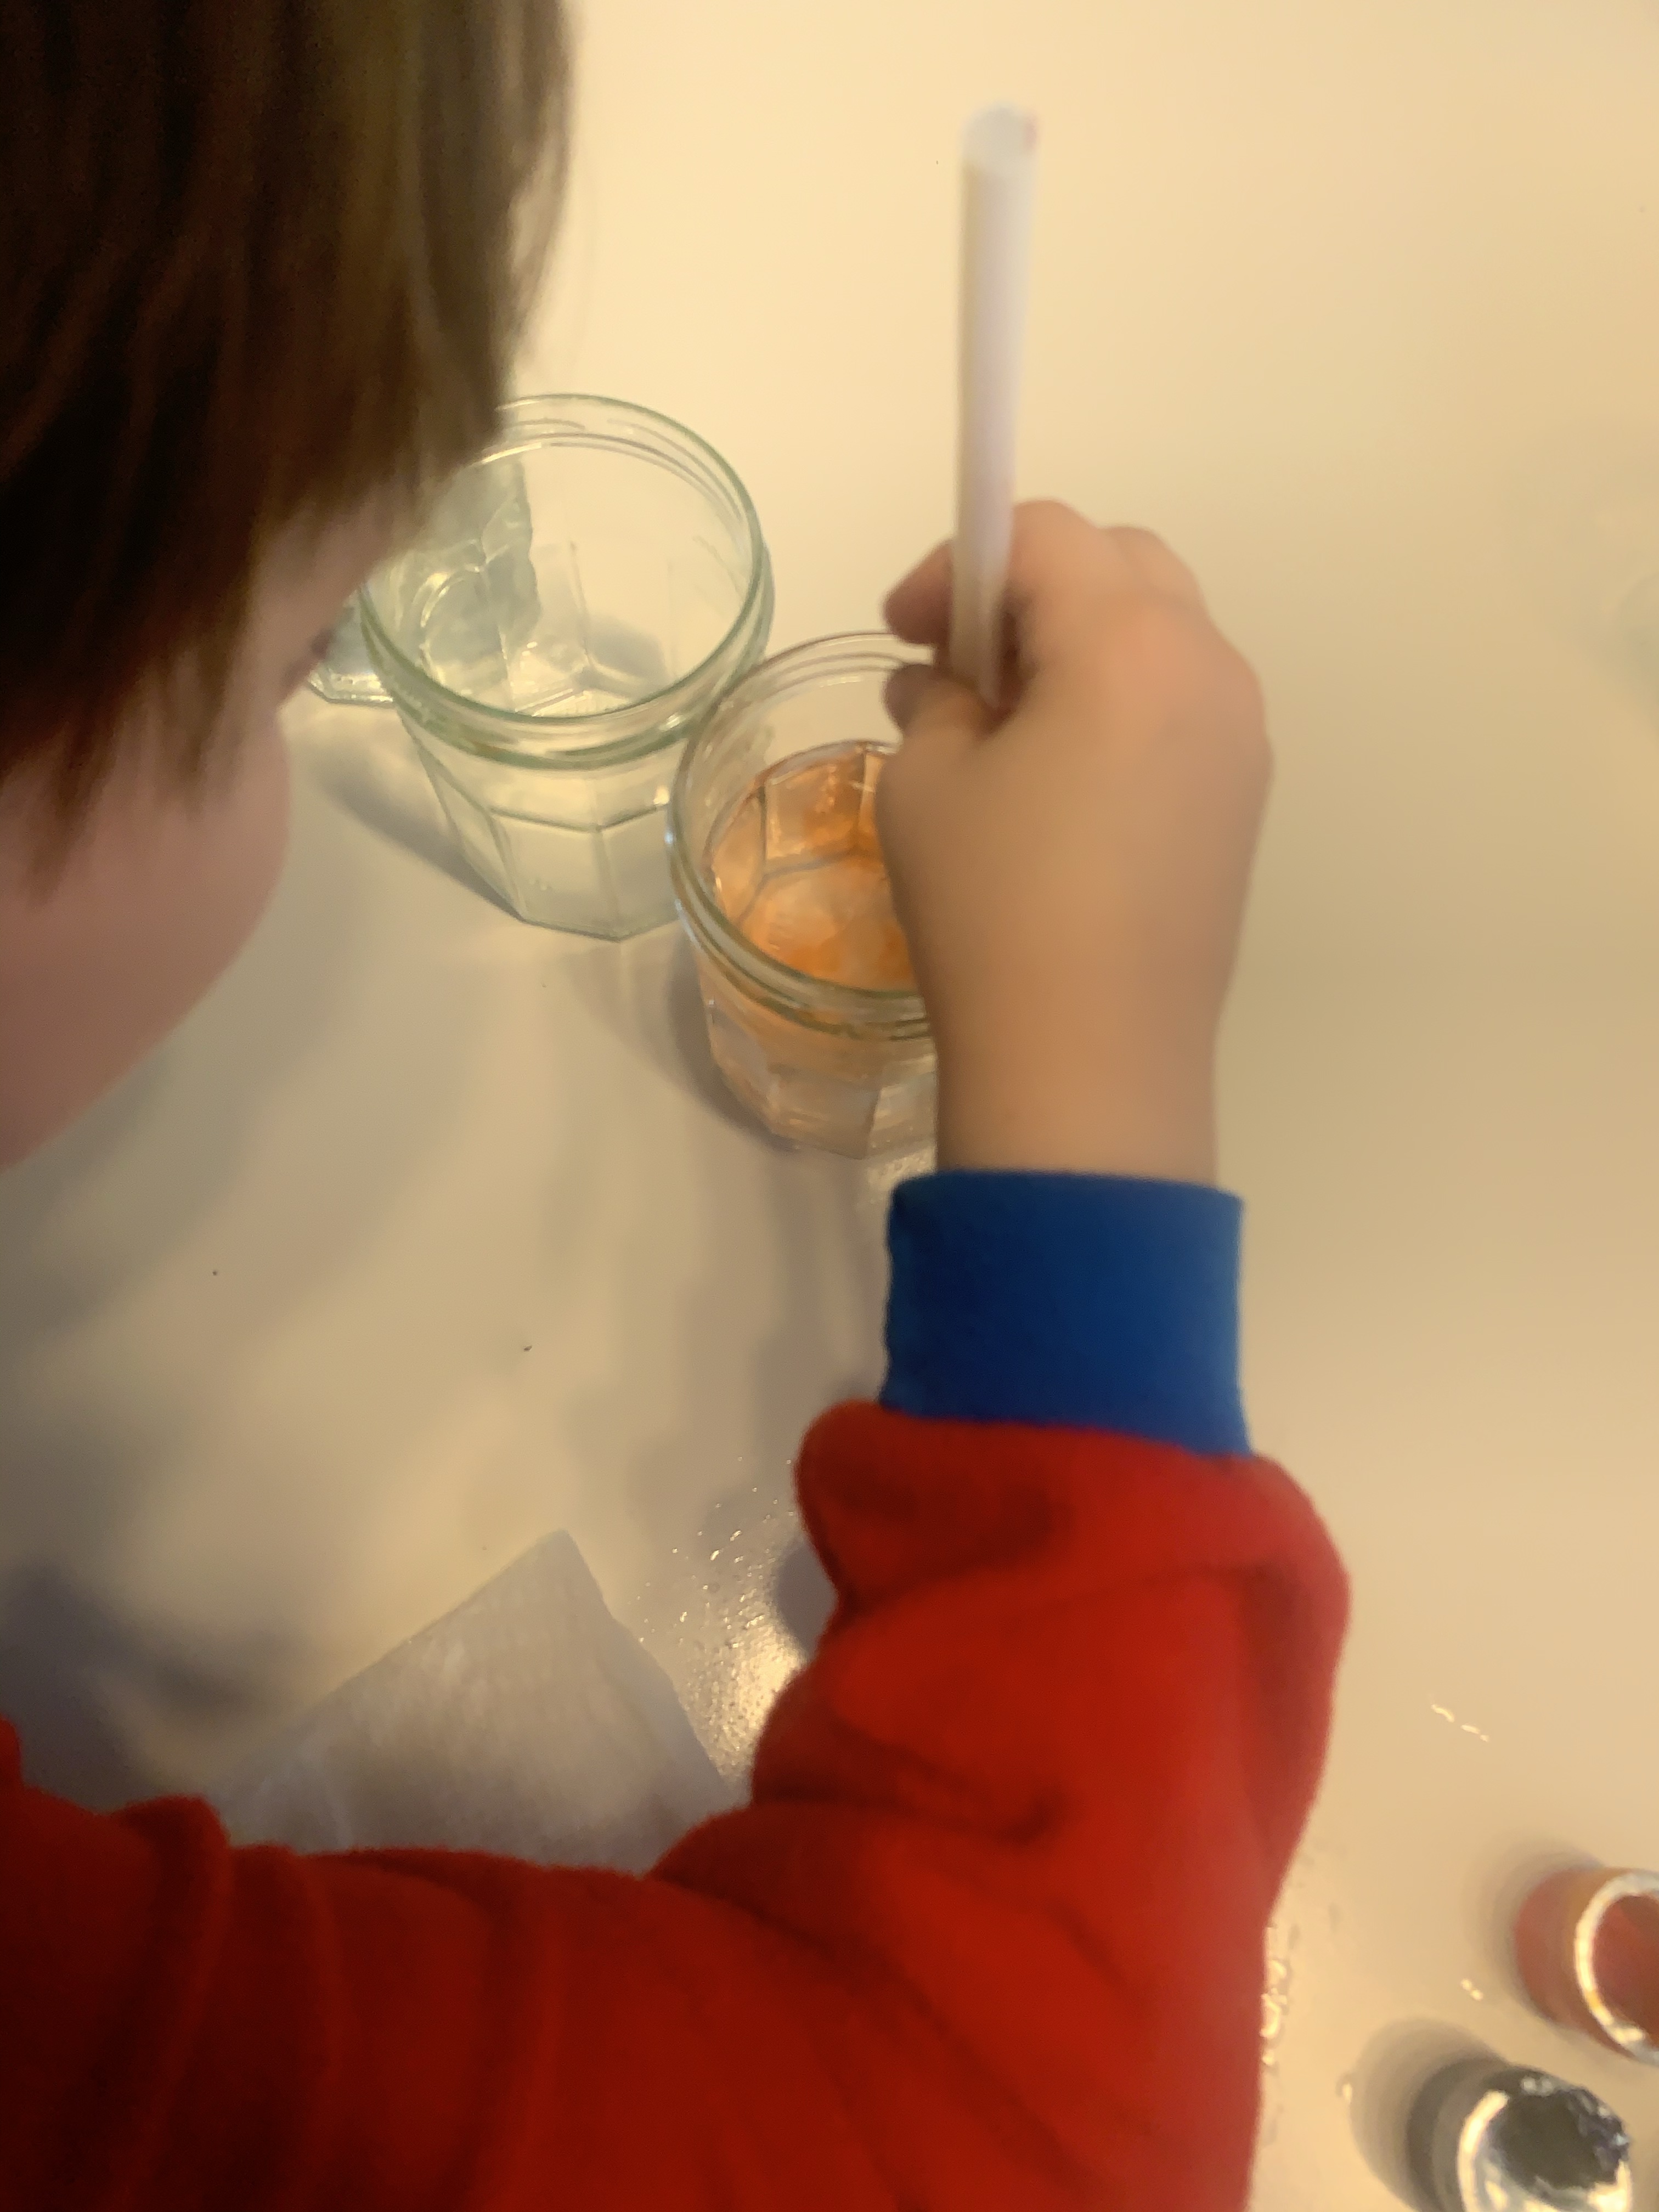
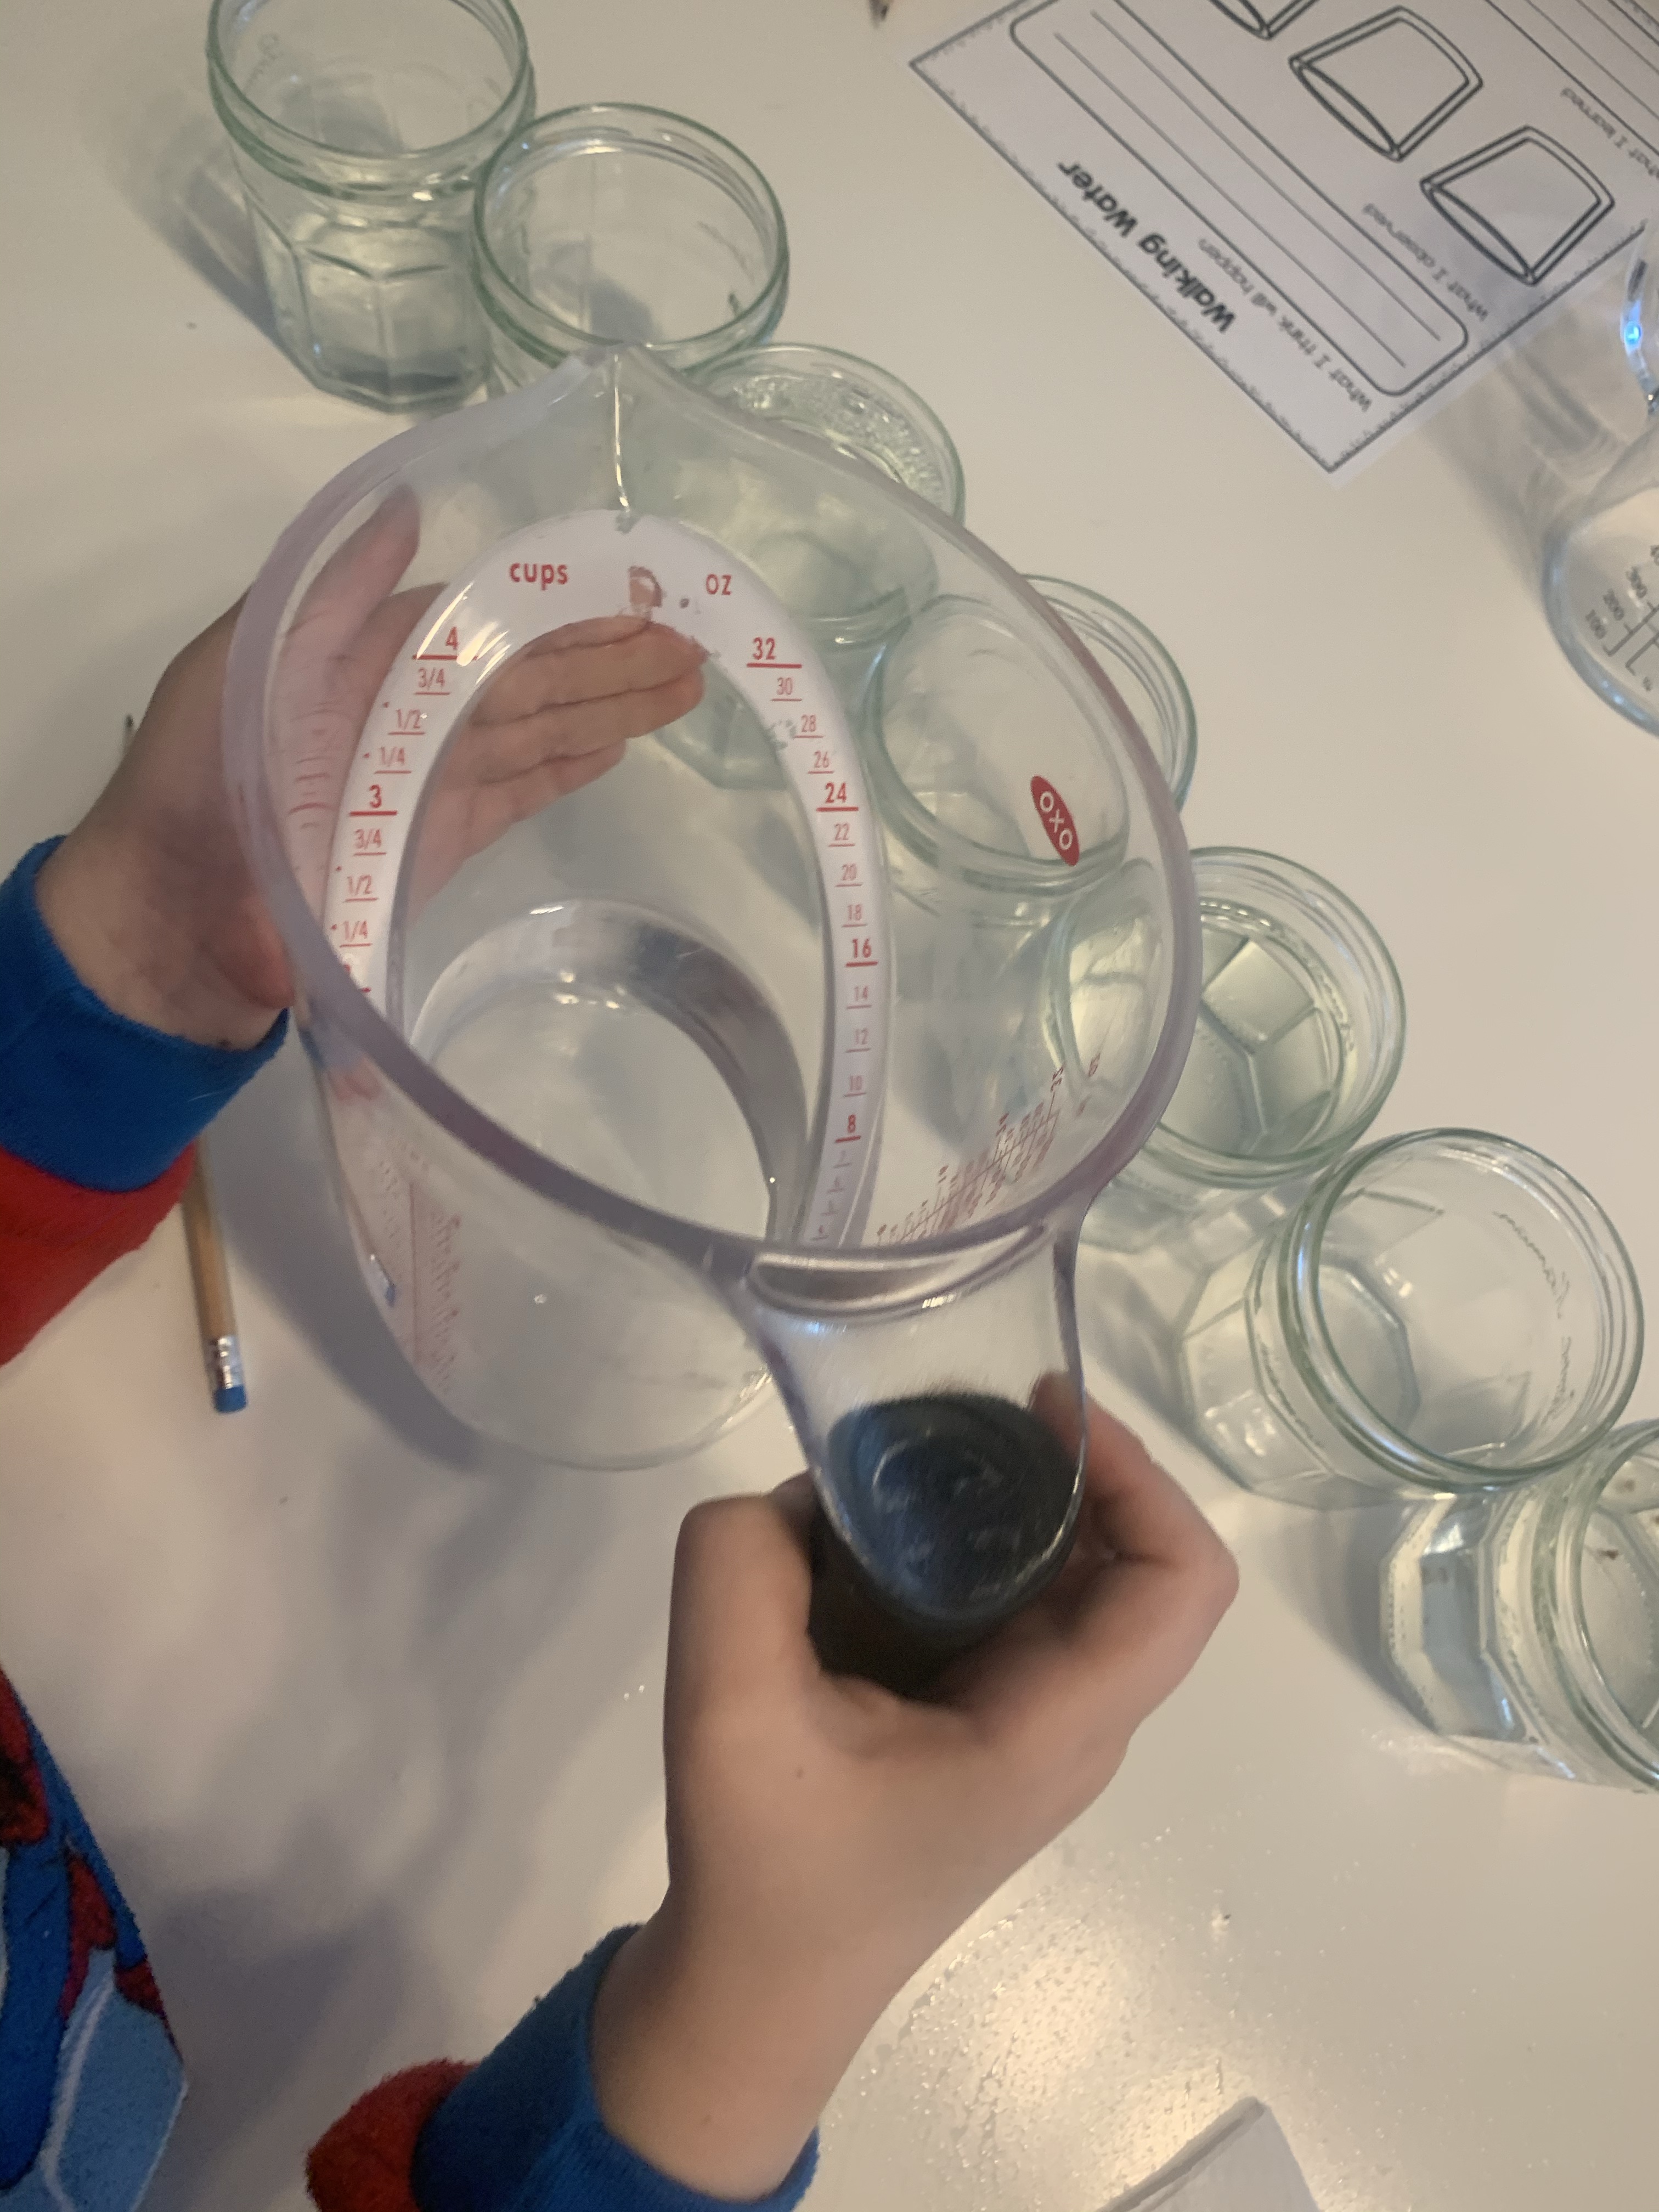
The kiddos started by lining up their jars. You can either do a straight line, or a circle. If you do a straight line you’ll need red at both ends. But if you do a circle you can do without it. The boys both had measuring jugs of water and they filled every other jar up to the top with water. Then then used straws to dip into food coloring and colored the water. Red for jar 1 (and 7 if in a straight line) yellow for jar 3 and blue for jar 5.

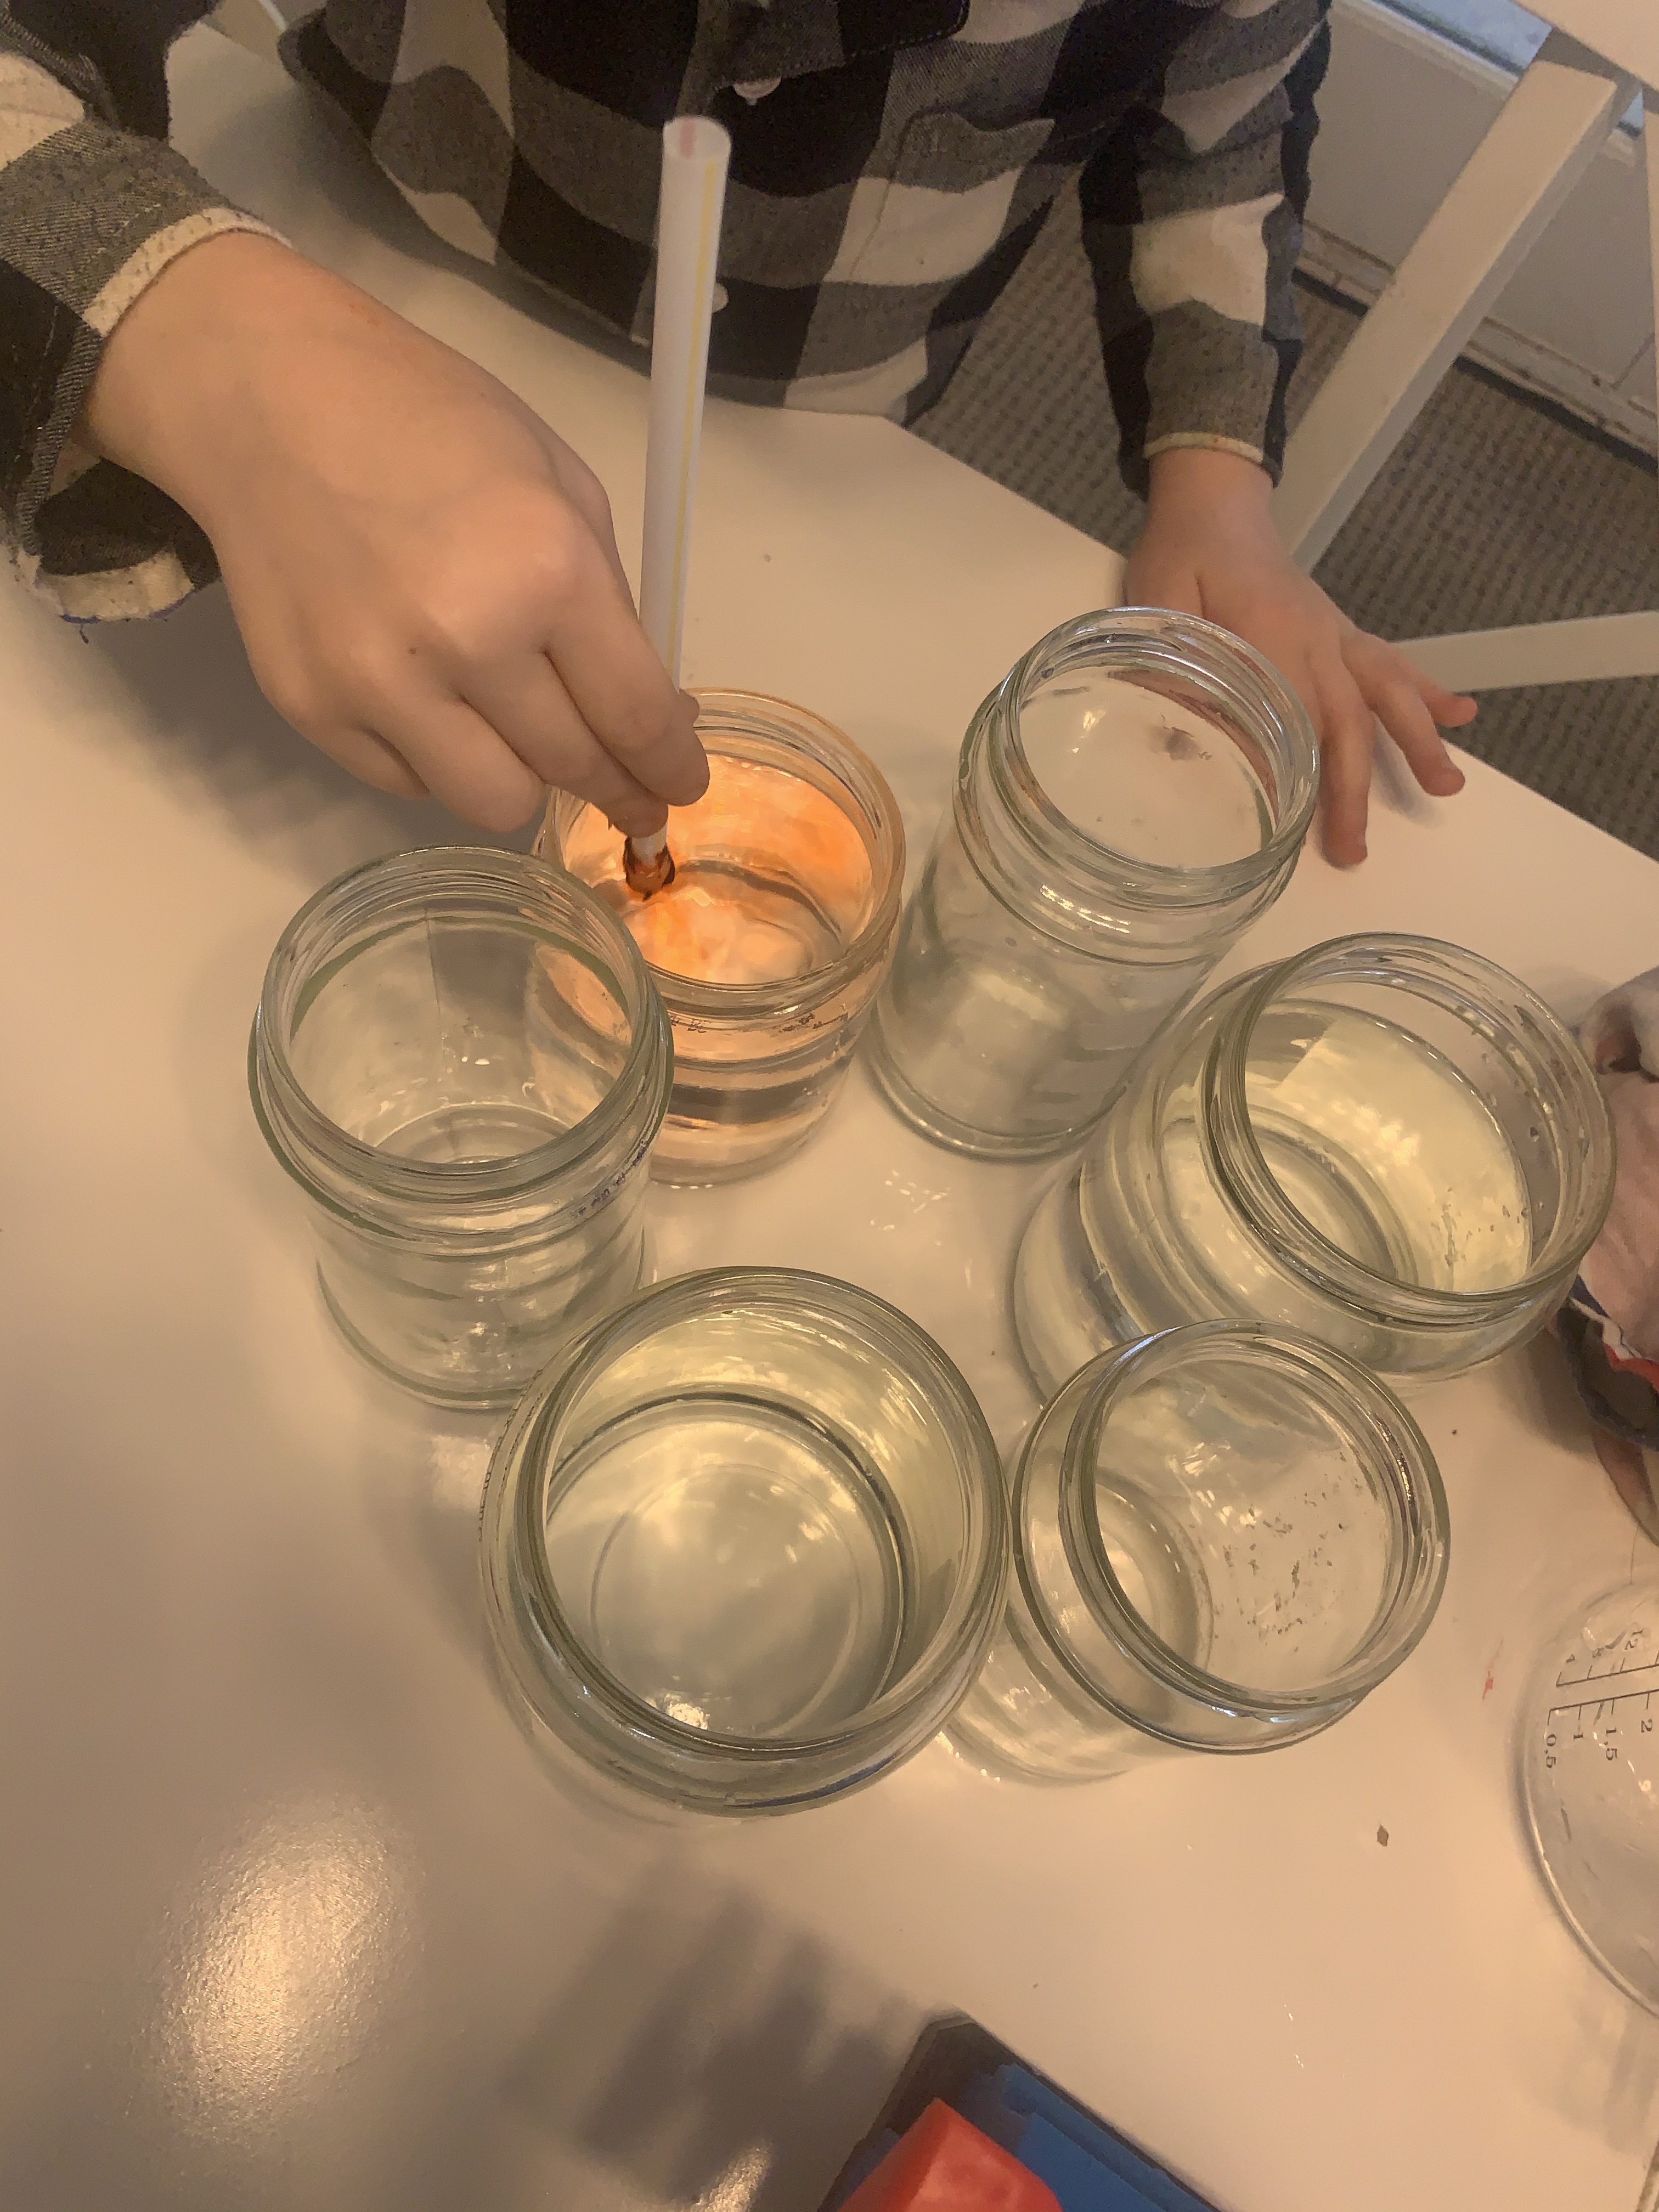
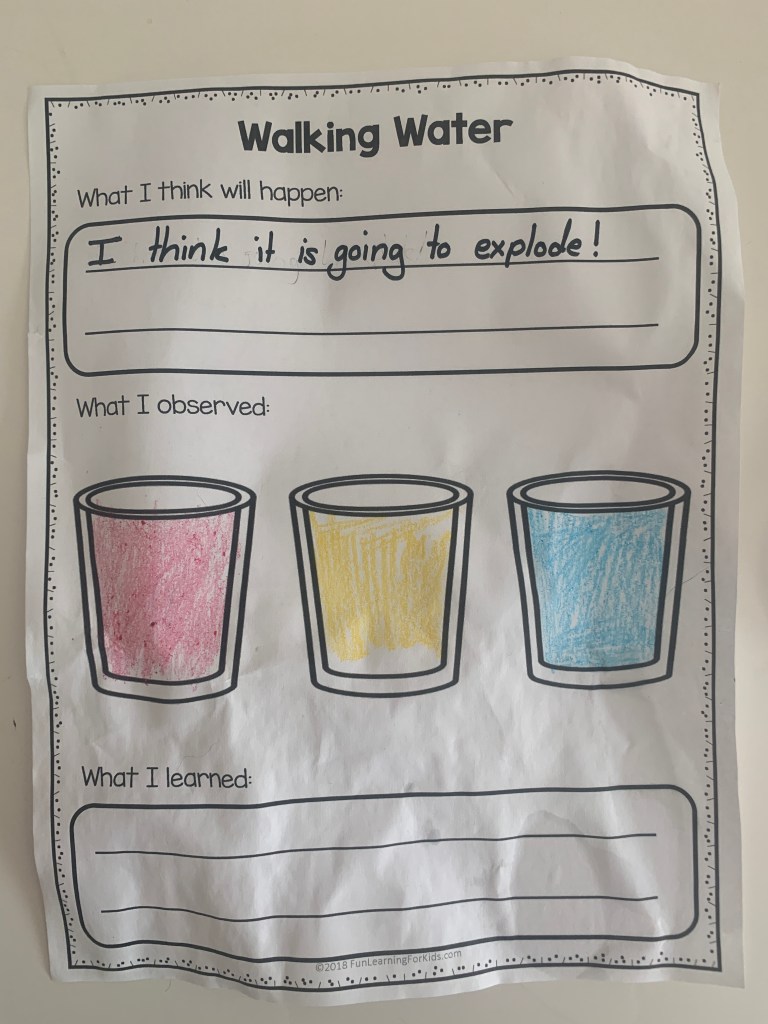
Once the water was all colored I explained to them how we would be folding up kitchen roll and making bridges from each jar to the next. We took this opportunity to fill in our prediction sheets once they had a good handle on how the experiment would work. Turns out you can lay it out as clearly as you can, but some kids still don’t get it, here is Teddy’s prediction below!
We left our experiments on the kitchen table with a timer for every ten minutes. Then we’d come and in from the playroom and see how they were doing. I thought it would take forever, but the paper towel absorbed the liquids surprisingly quickly. After about an hour the colors had spread, but I’d say it took another hour after that for the green and purple to be really vivid.
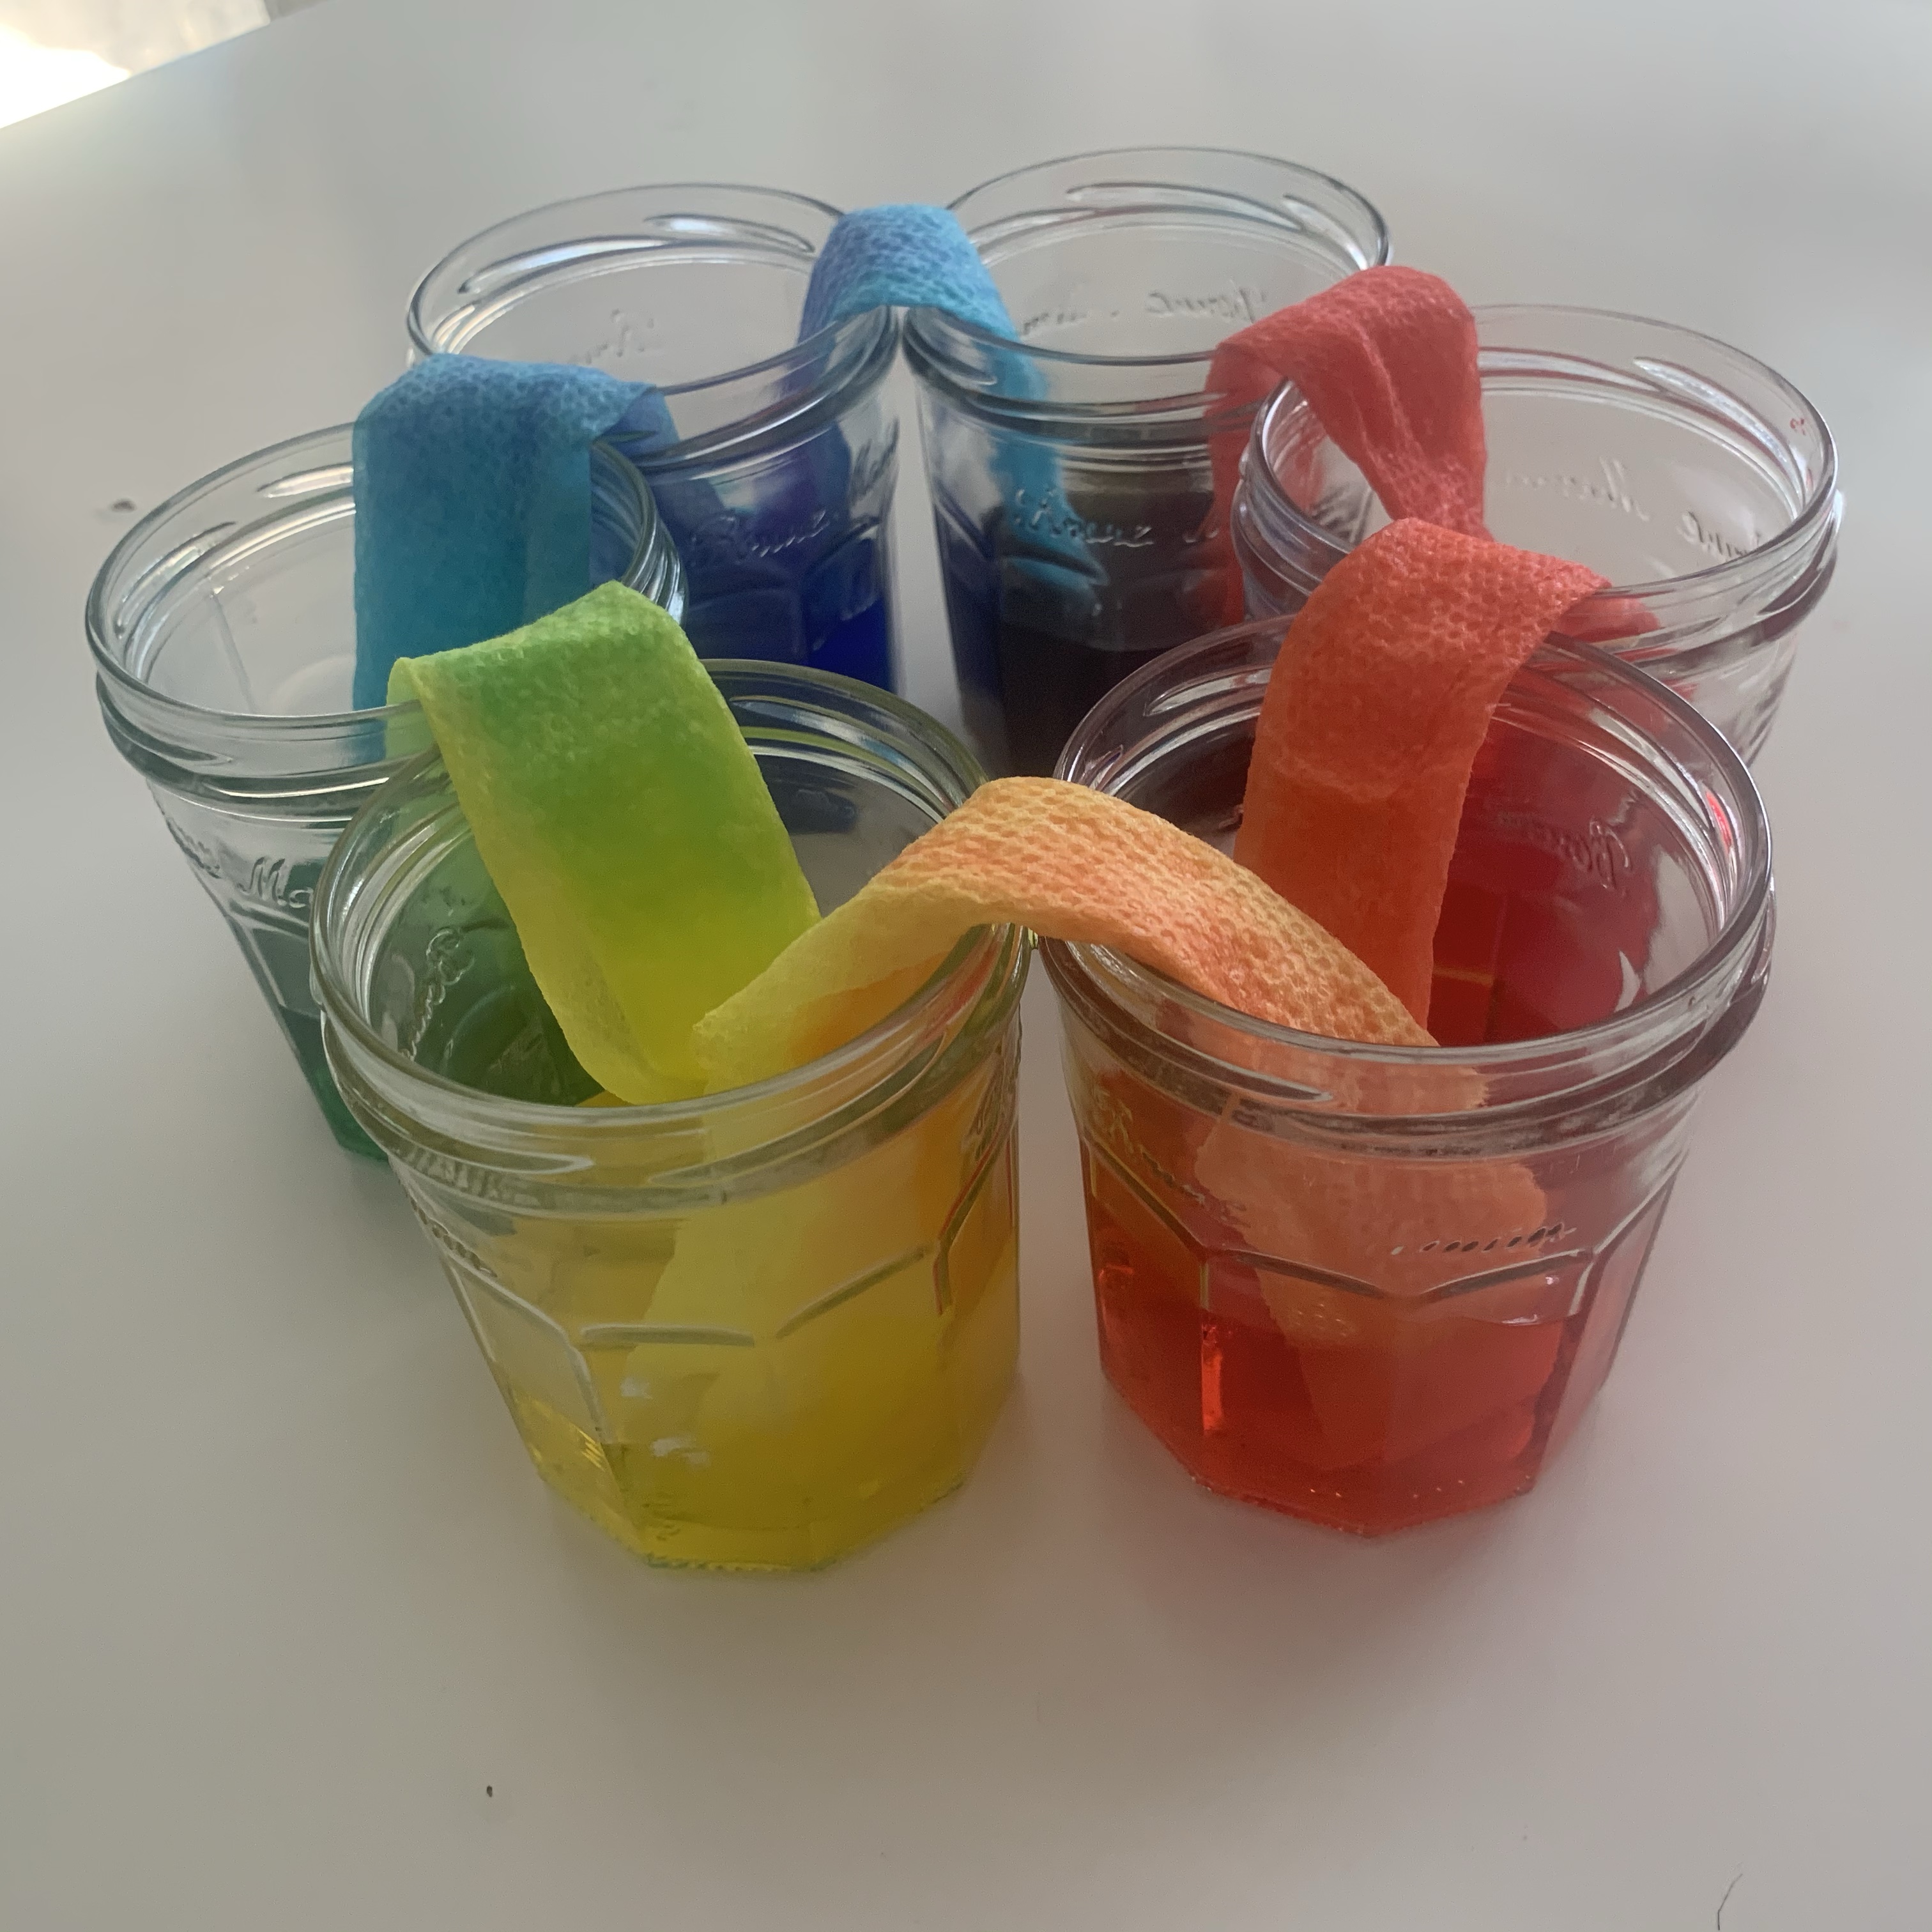
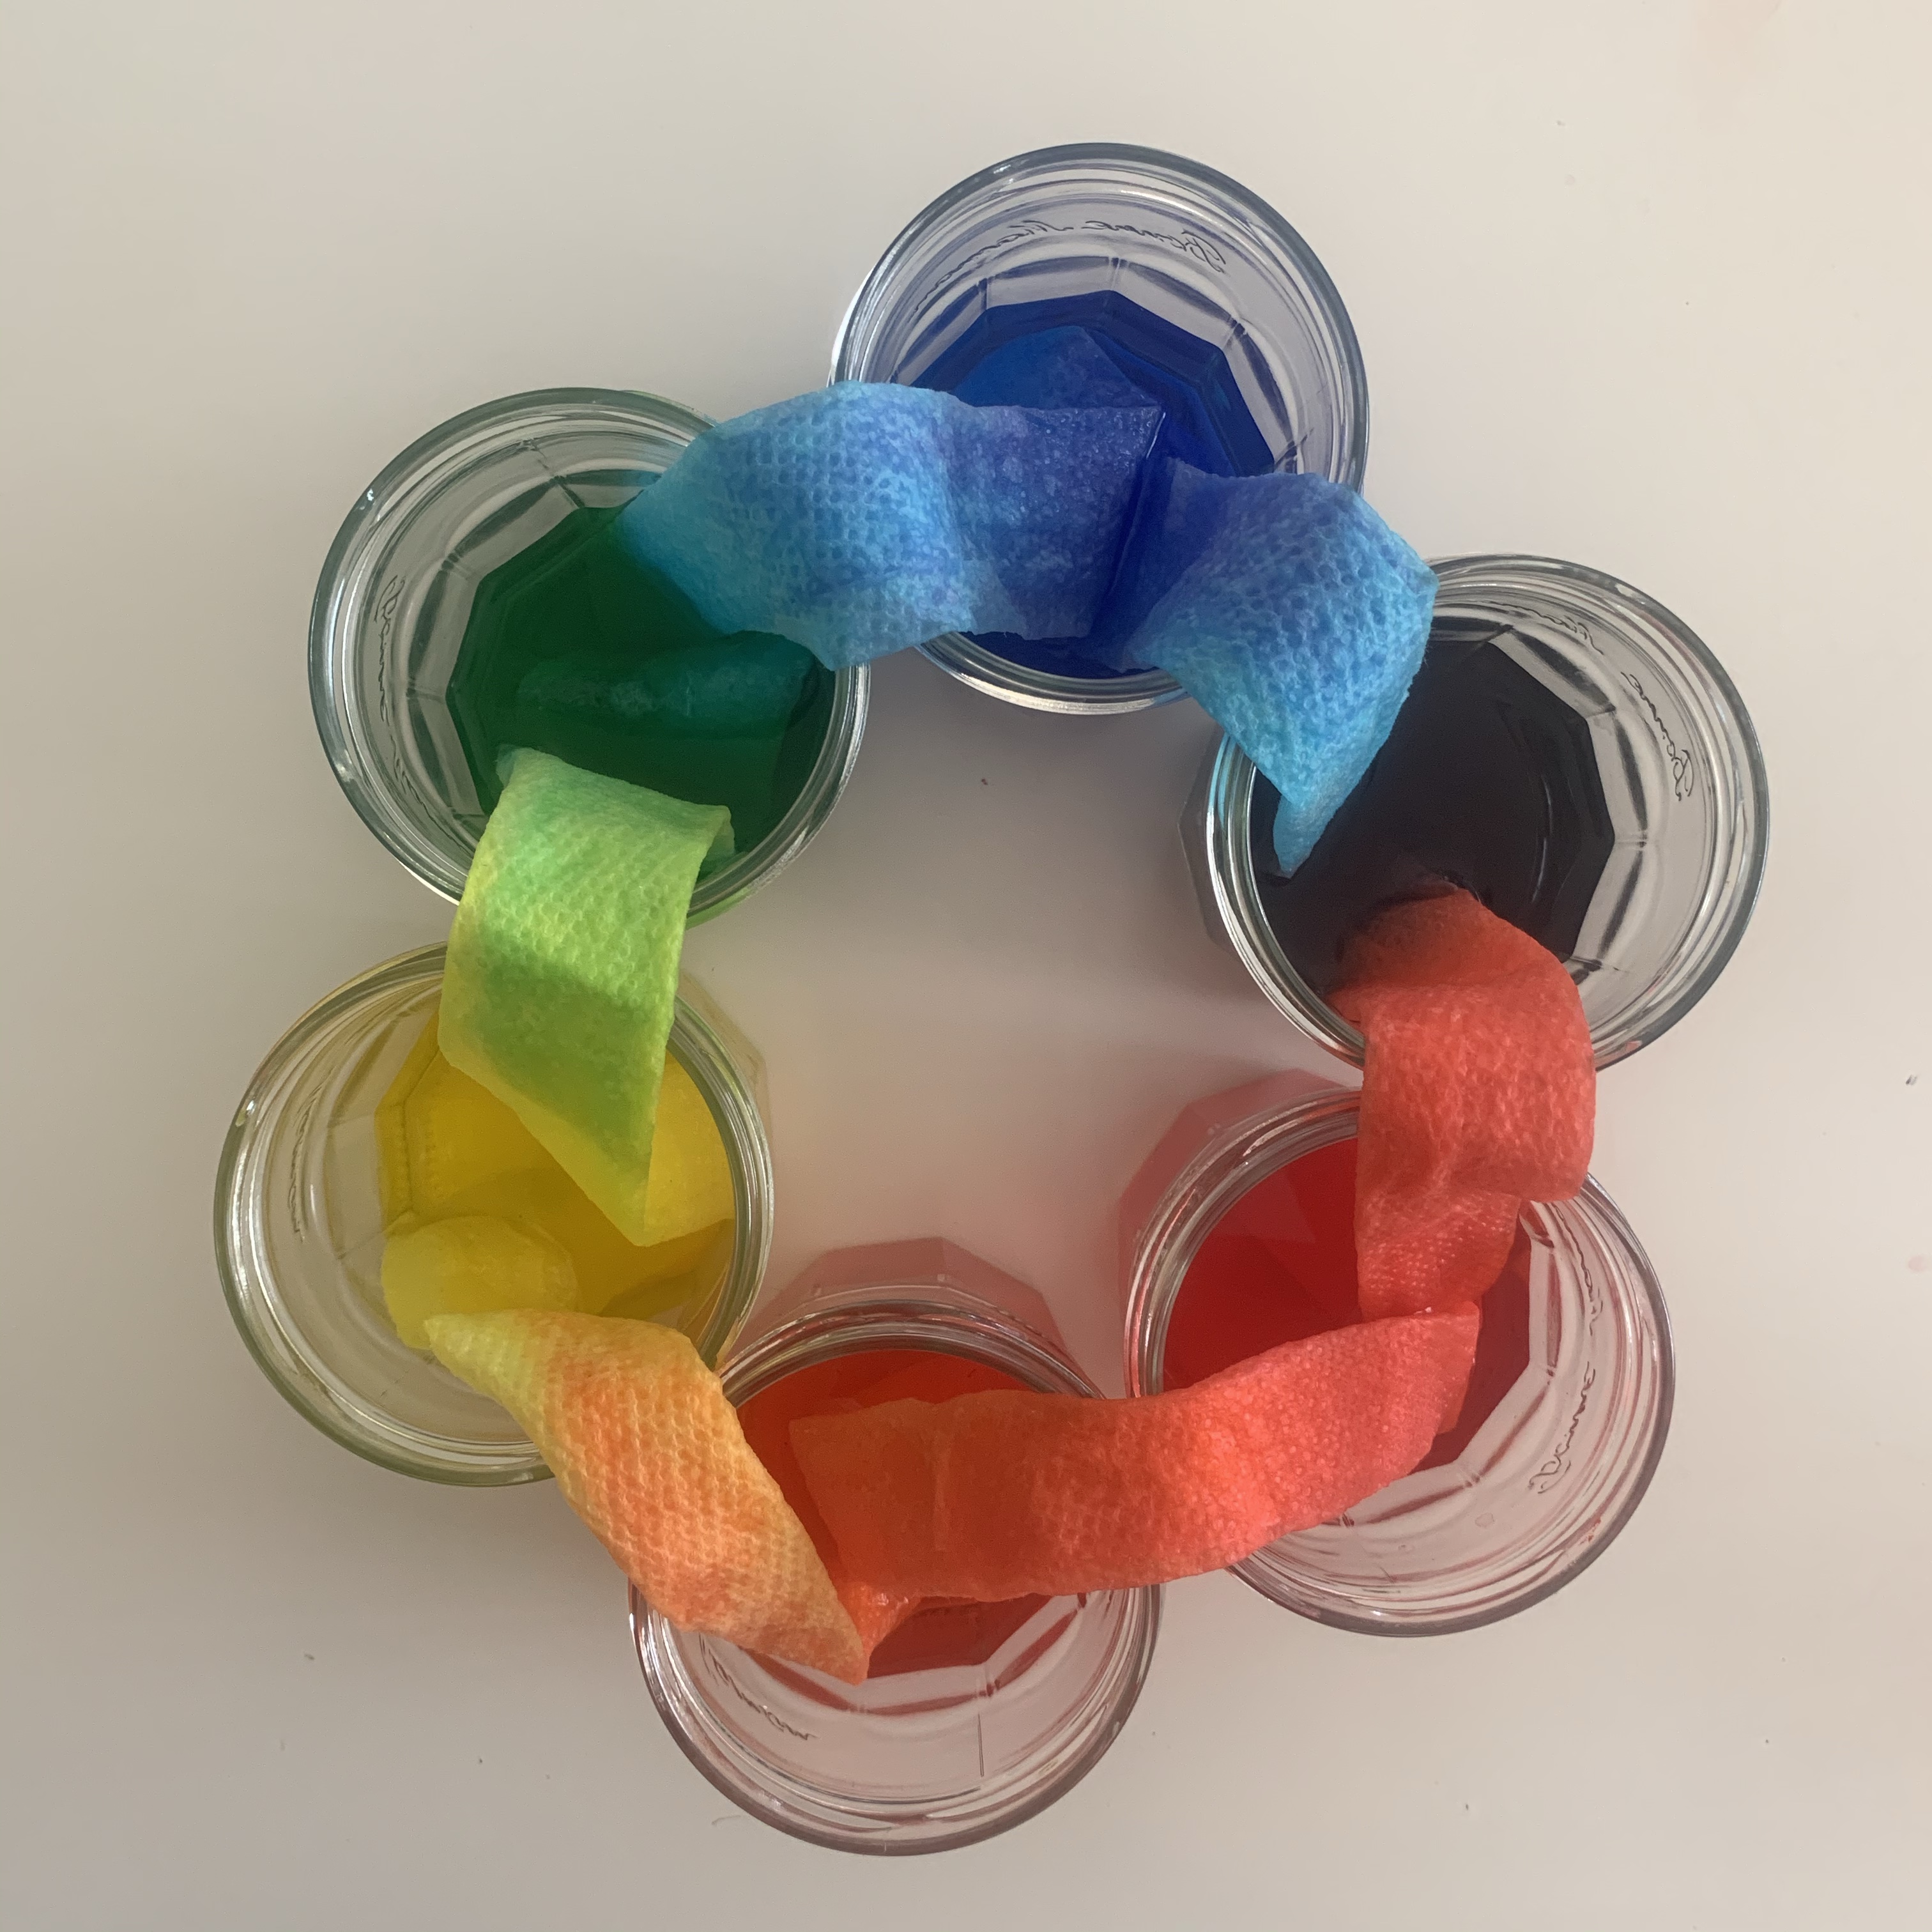
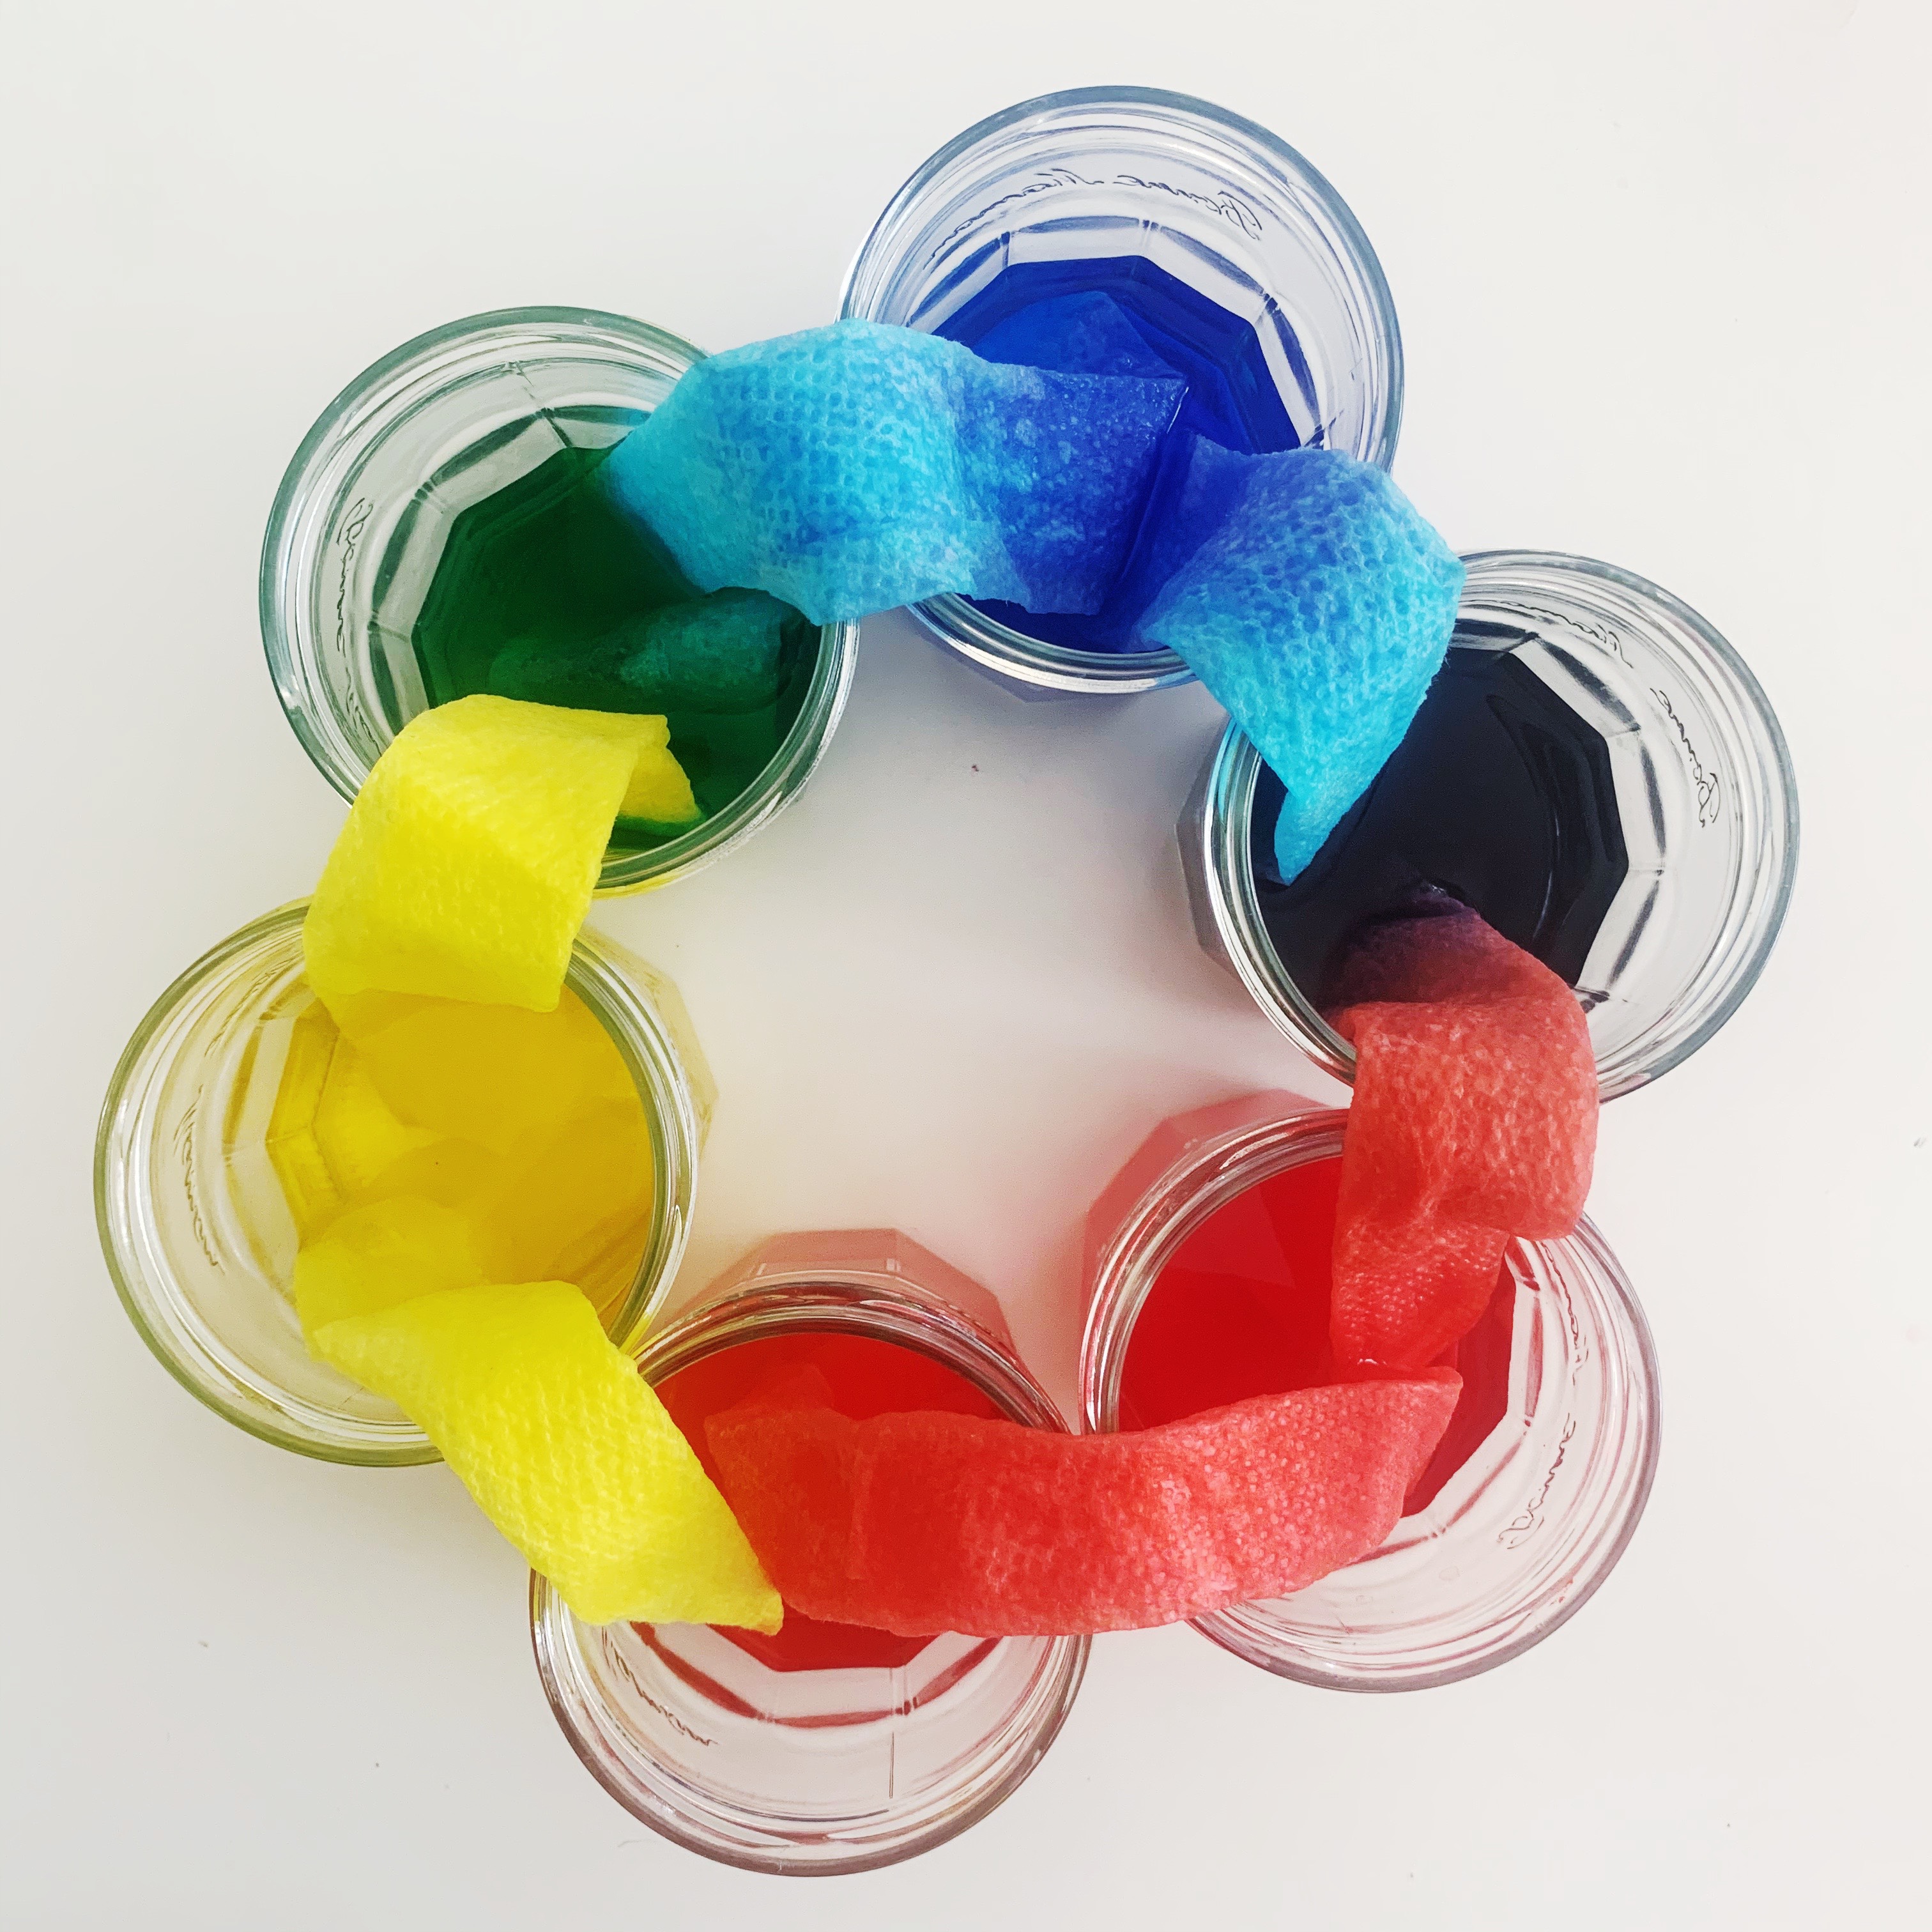
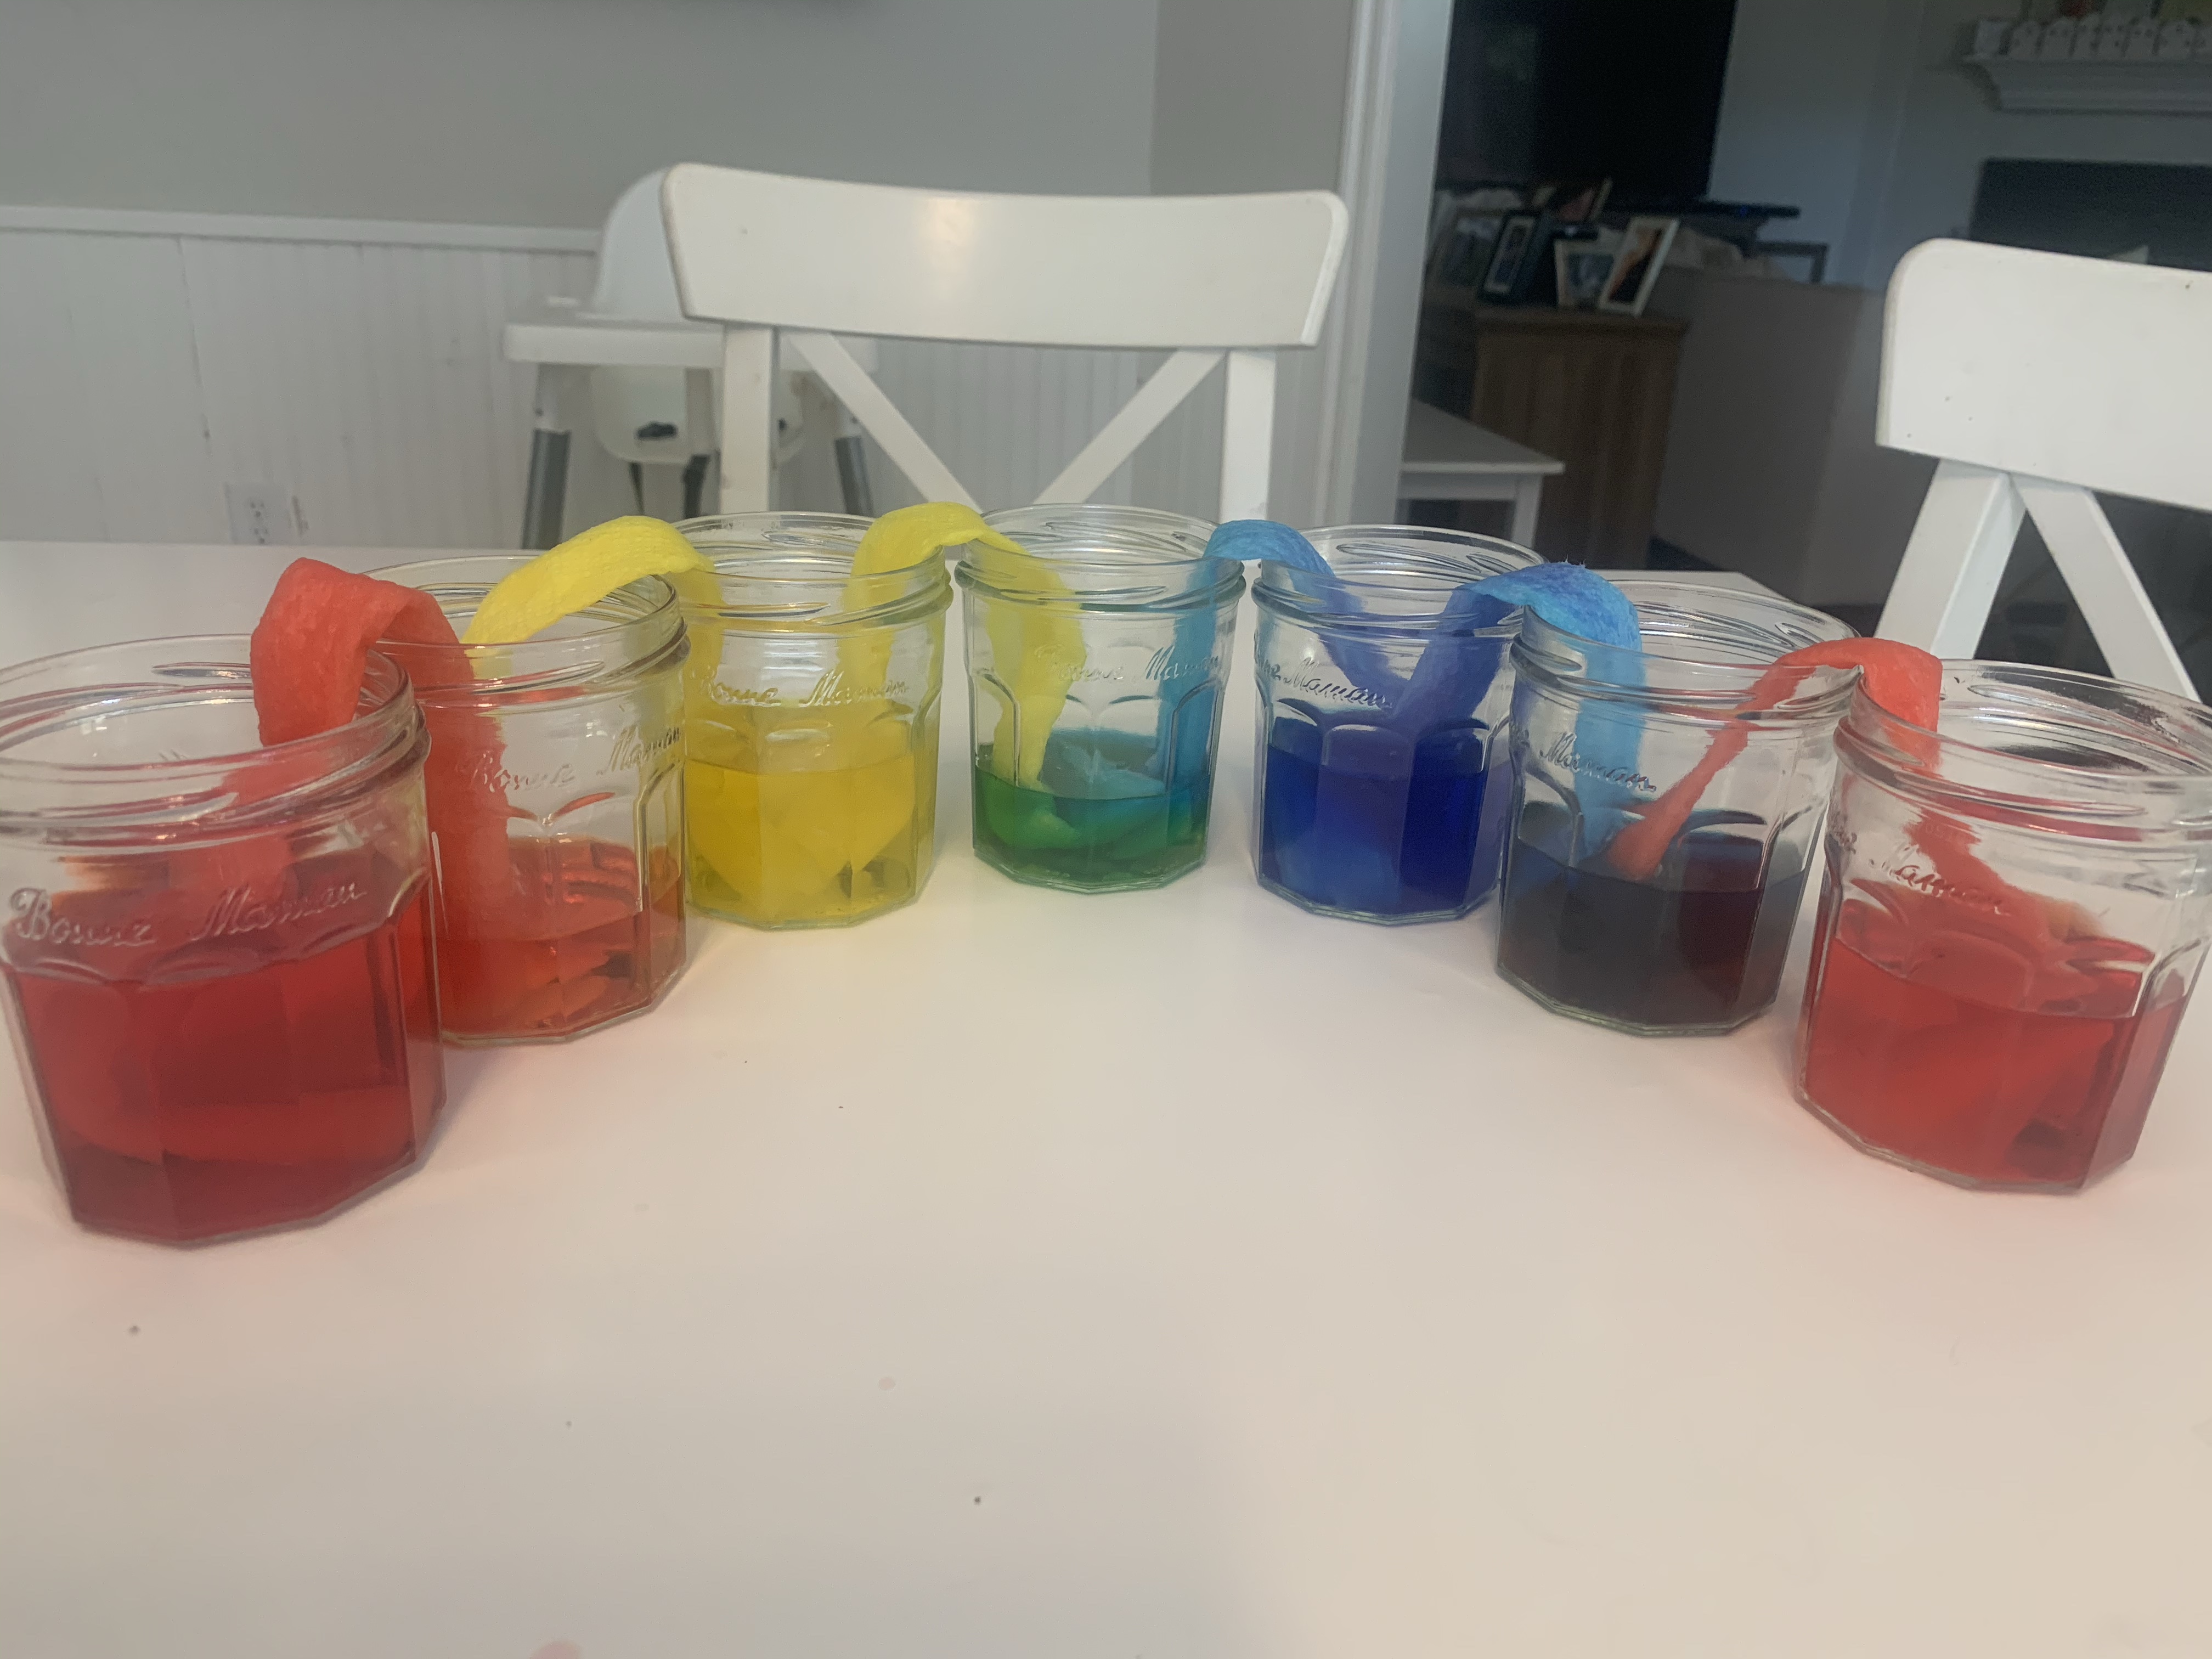
I really can not recommend this enough to anyone with a kid who likes colors and experiments. It was minimal effort once it was set up, using straws to mix the food coloring keeps it away from kids hands where it’ll stain for all time, and the clear up was easy. Definitely remember to fill the jars equally though, or some colors will travel much quicker than others.
LINKS AND SOURCES TO RESOURCES
- Craft: Rainbow handprints
- Read: The Friendship Rainbow
- Educate: Walking water experiment
- Watch: The Rainbow Fish
